- Join for Free

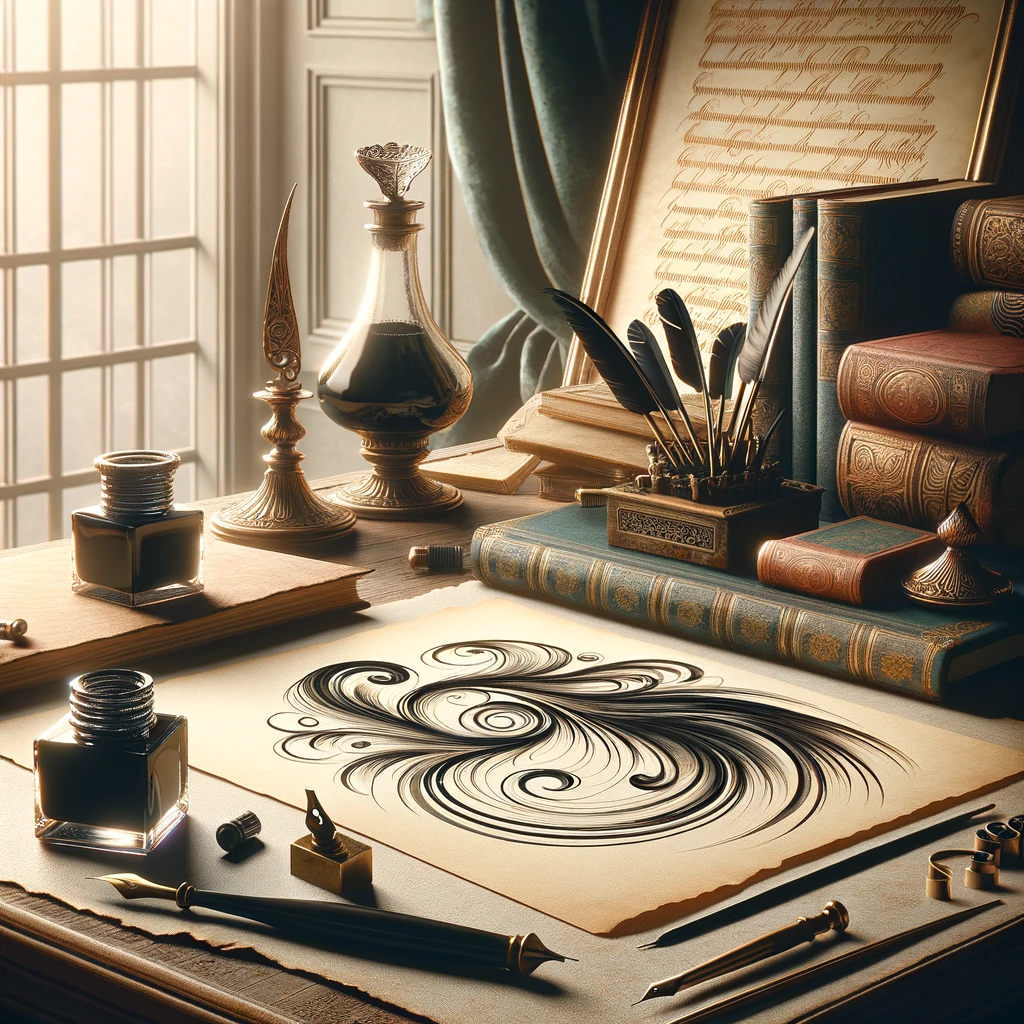
English Calligraphy from A to Z
A course by bego viñuela galarraga , calligraphy artist.

Explore Copperplate script and revive the power of freehand lettering
- Information

Each letter is its own world and has a distinct personality. This is what Bego Viñuela, calligraphy artist and founder of Bilbao Calligraphy, discovered when she began exploring this art form. With more than a decade of experience, she is known for her expertise in English or Copperplate calligraphy and her work has led her to collaborate with brands like Vogue, Mont Blanc, and the Guggenheim Museum Bilbao, among others.
In this course, she teaches you how to master the art of English calligraphy from scratch. Learn how to use the tools and draw upper and lowercase letters until you complete a full Copperplate alphabet.
What will you learn in this online course?
17 lessons & 7 downloads

- 99% positive reviews ( 932 )
- 27,948 students
- 17 lessons (2h 3m)
- 7 additional resources (4 files)
- Online and at your own pace
- Available on the app
- Audio: Spanish, English, Turkish
- Spanish , English , Portuguese , German , French , Italian
- Level: Beginner
- Unlimited access forever
What is this course's project?
Choose your favorite phrase, poem, or song lyrics and write them in English calligraphy.

Projects by course students

By loreduarteletras
By sofidlcastillo
Who is this online course for?
Anyone who wants to get started in this art form and enjoys creating with their hands, as well as graphic designers and illustrators who use calligraphy as a primary or complementary technique in their projects.
Requirements and materials
No prior knowledge is needed to take this course since Bego teaches you everything from scratch.
As for materials, you need a nib, a nib holder, 80 GSM paper, and ink.

nurvismonteverde
Me encanto ! excelente para personalizar proyectos.
View translation
Hide translation
Muy bueno el curso, me encanto, sigo practicando para hacerlo mejor
Un curso excelente. Muy aconsejable si te gusta la caligrafía. Muy bien explicado.
rahul_malhotraa000
excellent course for beginners
priscilaaventura
Adorei o curso, consegui aprender caligarfia de um jeito simples!
- More reviews

Bego Viñuela Galarraga A course by Bego Viñuela Galarraga
Bego Viñuela studied fine arts at the University of the Basque Country where she discovered the world of calligraphy, which motivated her to take a master's degree in advanced typography at the University of Barcelona. To fuel her passion for all things calligraphy, she has traveled the world honing her technique and learning from the best local and international teachers.
Since 2013, she has been sharing her knowledge of calligraphy techniques and approaches at her studio and school Calligraphy Bilbao. When she's not teaching, she works with different brands and crafts invitations for weddings and events.
Introduction
- Presentation
First steps
- History of English calligraphy
- Materials and tools
- Guidelines and ergonomics
- Basic lowercase traits
- Union of lowercase
- Capital letters
- Basic Features Uppercase
- Warming the hand
- Capitalization
Alternative letters and composition
- Alternative letters
- Numbers and signs
- Composition
Techniques: watercolors and gouache
- Write about dark backgrounds
- Write with watercolor
Final project
- Introduction to English calligraphy or copperplate
What to expect from a Domestika course
Learn at your own pace.
Enjoy learning from home without a set schedule and with an easy-to-follow method. You set your own pace.
Learn from the best professionals
Learn valuable methods and techniques explained by top experts in the creative sector.
Meet expert teachers
Each expert teaches what they do best, with clear guidelines, true passion, and professional insight in every lesson.
Certificates Plus
If you're a Plus member, get a custom certificate signed by your teacher for every course. Share it on your portfolio, social media, or wherever you like.
Get front-row seats
Videos of the highest quality, so you don't miss a single detail. With unlimited access, you can watch them as many times as you need to perfect your technique.
Share knowledge and ideas
Ask questions, request feedback, or offer solutions. Share your learning experience with other students in the community who are as passionate about creativity as you are.
Connect with a global creative community
The community is home to millions of people from around the world who are curious and passionate about exploring and expressing their creativity.
Watch professionally produced courses
Domestika curates its teacher roster and produces every course in-house to ensure a high-quality online learning experience.
Domestika's courses are online classes that provide you with the tools and skills you need to complete a specific project. Every step of the project combines video lessons with complementary instructional material, so you can learn by doing. Domestika's courses also allow you to share your own projects with the teacher and with other students, creating a dynamic course community.
All courses are 100% online, so once they're published, courses start and finish whenever you want. You set the pace of the class. You can go back to review what interests you most and skip what you already know, ask questions, answer questions, share your projects, and more.
The courses are divided into different units. Each one includes lessons, informational text, tasks, and practice exercises to help you carry out your project step by step, with additional complementary resources and downloads. You'll also have access to an exclusive forum where you can interact with the teacher and with other students, as well as share your work and your course project, creating a community around the course.
You can redeem the course you received by accessing the redeeming page and entering your gift code.
- Calligraphy & Typography
- Calligraphy

Courses you might be interested in
- Anastasia Shevchuk
- Feb 27, 2017
Calligraphy Art: Getting Started And Lessons Learned
- 18 min read
- Inspiration , Fonts , Design , Art , Lettering , Calligraphy
- Share on Twitter , LinkedIn
About The Author
Anastasia is web designer during the day and calligrapher at night. Over the last year she got seriously interested in calligraphy and lettering, with an … More about Anastasia ↬
Email Newsletter
Weekly tips on front-end & UX . Trusted by 200,000+ folks.
Typography is a primary element of composition. Being a designer, I pay a lot of attention to its quality. Operating Photoshop is easy for me; however, to level up my skills, I am always learning to work with letters, using my hands, without any computer programs.
The first time I took a calligraphy course was about a year ago, and the decision was quite hard. I was sure that it would be painstaking and that I would need excellent handwriting to learn this art. How mistaken I was!
"Type is saying things to us all the time. Typefaces express a mood, an atmosphere. They give words a certain coloring." – Rick Poynor (“Helvetica”, 2007)
Typefaces are always telling us something. We receive information through typography. Type influences us, adds coloring to words, sets a mood and atmosphere, assists, teaches, scares us, brings us joy and inspires us.
Typography is, foremost, an information medium. At the same time, it fulfils social functions and acts as an indicator of the age it belongs to. The contemporary world has its own rhythm , aesthetic and philosophy; while we are changing, everything is changing around us. In studying historical lettering in calligraphy, we can understand the character and potential of a writing instrument, and, as a result, we can manage its expressive means.
My Introduction To Calligraphy
When I joined the calligraphy course, I heard students talking amongst themselves: “I’ll never manage to do it this way!” “I can’t write in such a beautiful way!”
To tell the truth, I felt the same way. But that was nonsense! And I say that as a master of Photoshop who couldn’t handwrite plain lines only a year ago.
"Type is a visual language, which connects the writer and the reader." – Erik Spiekermann
Our first lesson was to write simple strokes, the basis of all letters, with a flat paintbrush.
Tip: A lot of useful resources and online courses are on the Internet. However, I recommend starting by learning from professionals (in workshops, at calligraphy schools). A professional will help you to develop proper technique, answer your questions and prompt you in the nuances of the craft. Even something as seemingly simple as one’s posture and pen-holding technique will substantially influence the result.
Studying in a course had a positive outcome. Writing with different instruments and trying different techniques, I could figure out which instrument suits me best.
I learned the history of calligraphy, I learned how to customize my workplace, and I learned how to choose an instrument. I practiced Cyrillic ornamental script, textura quadrata, italic, English roundhand, modern calligraphy, brush pen lettering and chalk lettering. I also learned how to make my own calligraphy instruments.
"Calligraphy is the most intimate, personal, spontaneous form of expression. Like a fingerprint or a voice, it is unique for each person." – Hermann Zapf
Tip: I recommend devoting your initial lessons to writing with a flat paintbrush. Get accustomed to the instrument, and study the “skeleton” of letters (graphemes). Soon after that, practice Cyrillic ornamental script, textura quadrata and italic.
Write the alphabet, then start with words and continue on to sentences. Next, you could proceed to study the pointed nib and the typefaces that rely on it: English roundhand, modern calligraphy script, flourishing, Spencerian and other Copperplate styles.
"With the development of an international exchange of information, there is a need for universal fonts. Today, Texture and other Gothic fonts are only used as a reminder of a bygone era, in particular, in newspaper logos." – Erik Spiekermann
Each lesson was a meditation. Soon after a lesson, I felt relaxed, energetic and inspired. And I got a good result on paper! The craft is a remedy and exercise for the mind and soul.
My Own Project: “Hello From…”
Having fallen in love with calligraphy, I came to prefer a sketchbook to a camera while on vacation. At a conference in St. Petersburg this spring, I got inspired by various graphic designers’ presentations and by the talk by renowned calligrapher Pokras Lampas . I wanted to put everything aside and write something. In such an inspired state, I signed a card to say hello to my friends from that wonderful city. Thus, a simple card began my project “Hello From.” The idea was to show the essence of a place through lettering; I would take a photo of the card with the city in the background.
Other photos from the project can be found below. You can stay up to date on my Instagram account ! There will be many interesting countries and medieval-aged cities soon!
Benefits: What Is The Use Of Calligraphy Lessons?
- Pleasure You will derive great pleasure from working with your hands.
- Patience Calligraphy is meditative. Diving into the world of letters and waltzing through the soft lines will make you more calm and serene.
- Age not a factor Banish the thought that you can’t start learning because of your age. At any age, learning has a positive effect on the brain and expands one’s worldview. It is also good to teach children calligraphy, which will improve their brain activity and develop their fine motor skills.
- A sketchbook, not a camera, for vacation I guarantee that you will see quick and steady progress and that you will want to take your sketchbook and pens with you wherever you go, to be able to write whenever you get inspired.
- Attention to surroundings You will become observant. You will find inspiration for new work everywhere, from building faces on the street to old books on the shelf.
- Unique corporate identity More and more companies are using calligraphy and lettering in their trademark style. It lends uniqueness and instills trust in the customer.
- Manual dexterity The skill has an influence on one’s thinking, memory, imagination, powers of observation, coordination and agility.
- Inexpensive Most of the tools can be found at an affordable price. And craft paper can be done with the help of coffee, paint, etc.
- Monetization Nowadays, calligraphy is especially popular for wedding invitations, holiday cards, logos and many other design elements.
Possible Challenges
- Damage of tools . Without sufficient knowledge, one might find it difficult to write with a nib. This could lead to tool damage, catching paper with the nib and, as a result, torn paper. A beginner might even give up because of such bad results.
- Silence helps . Some people (though not everybody) might have a problem working when a lot of people are distracting their attention. I recommend training in silence, relaxed and concentrated.
- Bad mood = bad result . You will not be able to draw soft, delicate lines in a state of anger. If you are in a bad mood, put the work aside.
As in sports and music, in calligraphy it is important to train every day, to be patient and to feel inspired.
Achieving Good Results
Here are some tips based on my experience:
- Learn every day. Attend master classes and courses, study online, and participate in competitions.
- Practice by copying. Choose projects you like and copy them to understand how the composition and contrast work.
- Warm up. Start with some warmup exercises before getting down to work. Clench and release your fingers, rub and move your hands in circles to warm them up. While writing, do eye exercises from time to time.
- Collect different styles of handwritings. You can find these in postcards and old letters. Analyze them. These will help you to come up with new and interesting combinations of typefaces.
- Try new things. Write with different tools and on different kinds of paper. Conventional designs are only one benefit! I write on wallpapers, bookshelf stands and old notebooks. It’s enough to begin writing with ordinary tools everybody has at home (pencils, brushes, markers). If none are at your disposal, then you can get creative and even try writing with a carrot, for example.
- Take care of your tools. Wash and wipe dry your tools after each exercise. When I was a beginner, I rusted and damaged several nibs irrevocably because of untimely cleaning.
- Show your work to professionals. An objective review will help you to find and correct mistakes. Don’t be offended by criticism; treat it as a compliment.
- Don’t worry about other people’s opinion. Don’t give up, even if your progress is not as fast as you would like. Good results will come.
- Mind your sitting posture. This rule is key to beautiful handwriting. If you follow it, you will be able to work at the table for a long time without discomfort or hand pain.
- Collect references. A box of ideas is very helpful. When I’m not feeling inspired and need a creative punch, I close my eyes and take out two magazine cuttings; I’ll analyze them and try to combine their styles and play around with them.
Sources Of Inspiration
"Inspiration. From real life. I open my eyes and I travel and I look. And I read everything." – Erik Spiekermann
It is hard to create something without experience. Therefore, I recommend collecting ideas. However, at the beginning, after looking through hundreds of beautiful pictures, I sometimes lose confidence and think, “I can’t do that!” Calm down. Before you panic, do the following:
- Open the cabinet. If you have a box of old postcards and magazines, look through them. Cut out worthwhile elements and put them in an ideas box (your personal, offline Pinterest).
- Wander the city with a camera. You will find a lot of bars and cafes with interesting logo designs, window designs and branding. These visuals will give you ideas for interesting compositions.
- Hit the market. Buy a couple of cheap vintage books and postcards from your local book market. Analyze the typefaces, text designs and color schemes.
- Meet new people and share your experience. Together, you can create new projects and get valuable feedback. Showing your work to others will enable you to find and correct mistakes more quickly. Collaborate with photographers and other creative people.
- Follow trends. Analyze what is in fashion now and what will be in fashion for the next couple of years. Constantly move forward.
- Check in on Instagram, Pinterest or Google. Here, you will find plenty of beautiful design work. However, be cautious, and don’t be overwhelmed. The less you look at readymade solutions on the Internet, the better. You want to give yourself the chance to create something completely unique.
Interested In Calligraphy Yet?
Then let’s start! Let’s look at the tools you will need for the first lesson.
Sure, you don’t have to buy everything in this photo! Consider your abilities and preferences. Below is a detailed list to give you a general idea of the tools you’ll need for different styles of writing:
- paper for handwriting,
- printed handwriting worksheets,
- examples of alphabets,
- pair of compasses,
- pigma micron permanent pens,
- rubber and kneaded rubber,
- calligraphy ink,
- flat paintbrushes,
- straight pen holder,
- oblique pen holder,
- nibs (square cut and pointed),
- Pilot Parallel pen and cartridges,
- brush pens,
- water brush.
Details About Tools
In the beginning, ordinary notebooks, copy books, office paper and even old wallpaper will be enough for practice. Try to get paper with a smooth surface and a higher density than office paper; otherwise, the ink will not flow and the nib will not catch the paper. Rhobia and Fabriano paper are quite good, but try different variants to find the best one for you.
Unused wallpaper and draft work is perfectly suited to writing with brushes and brush pens. At a more advanced level, you could use texture paper and handmade paper, which is great for making postcards and wedding invitations.
Printed Handwriting Worksheets And Alphabets
This is mandatory: It is impossible to write letters at a proper height or write a line of text without positioning and marking the sheet of paper. The most handy solution would be to put a printed handwriting worksheet under the sheet of paper you’re writing on. The worksheet will show through the paper, guiding you on the height and incline of elements. A ruler and pencil might also help, but lining would take time.
You can download handwriting worksheets or make the required adjustments yourself (second link in Russian).
Samples of alphabets will show you how to draw letters correctly. Print them out and put them under your sheet of paper as a guideline. Examples can be found and downloaded on Pinterest .
I recommend writing each letter on a separate sheet of paper, to better remember the motion of letters and to train your hand. This will surely take more time, but after you’ve written a lot of drafts, your hand will move confidently without trembling, and you will remember how letters are drawn by heart. Let’s start!
Calligraphy Ink, Ink And Paint
Stores offer a great selection of calligraphy ink. Choose whatever you want — experiment! For an entry level, ordinary watercolor paint is quite enough.
Chinese ink is perfect for this work. But pay attention to the expiry date. Buy fresh ink, otherwise you risk getting clods, which will impede the flow of ink from the nib.
Dr. Ph. Martin’s ink is one of my favorites. The selection of colors and variants is quite extensive, but it is quite expensive.
Pearl ink looks beautiful on dark and high-contrast surfaces. I like Finetec’s dry golden palettes. Work done with it looks exquisite.
Flat Paint Brushes And Brush Pens
As mentioned, I first learned to write with a flat synthetic paintbrush. It’s a great choice for learning letter graphemes, and it is the most economical choice.
Brush pens are a good tool to learn brush calligraphy and lettering. They come with and without cartridges. Brushes have different quality levels, densities, sizes and shapes. Find one you are comfortable writing with.
Water brushes are handy because you can fill them with ink or watercolor yourself. The disadvantage is that if, used improperly, they can get dry or dirty. I prefer to put my water brushes in ink or paint but not to fill them in. This way, they last longer.
Pen Holders
Pen holders can be straight and oblique. A straight pen holder is good for square-cut pens and for writing different typefaces (for example, rustic capitals, square capitals, uncials and artificial uncials, textura quadrata, italics, etc.).
At the same time, an oblique pen holder with a pointed pen better suits cursive writing. Due to its initial incline, you will not have to bend your hand so much. It can be adjusted for different pens or just one particular pen.
Oblique pen holders have a flange at the end of the handle — the metal part of the holder where the pen is put in. This helps to regulate the angle of incline.
I also have a straight holder that looks like a feather. It is more decorative and adds some atmosphere as I’m working, but it is not as comfortable as other holders. I use it mainly for photos.
Nibs are square cut or pointed. As suggested earlier, you’d better learn typefaces with a square-cut nib. These nibs are quite rough, which makes the work easier and which will train you for a pointed nib.
Tip: If you are left-handed, you just need to find a nib that bends from right to left.
Pointed nibs are specially designed for cursive. They come in different sizes and can be used for different line thicknesses and different writing styles. After trying several of them, you will find a favorite.
Tip: Take care of your writing tools. Wash and wipe dry your tools after each exercise.
Pilot Parallel Pen
These are wonderful pens with a square-cut nib! They are very firm and comfortable to use. Though they work with the original cartridges (which are quite expensive), the empty ones can be refilled with a syringe.
Mmm, books! You will find a lot of useful information and tips in books. I recommend beginning with these wonderful ones:
- The Art of Calligraphy
- The Calligrapher’s Bible
- The Complete Calligrapher
- Modern Calligraphy and Hand Lettering
- Calligraphy: A Book of Contemporary Inspiration
- Step-by-Step: Calligraphy
- The Complete Book of Chalk Lettering: Create and Develop Your Own Style
In these books, you will learn the history of calligraphy, find descriptions of diverse alphabets (written using the elements of handwriting worksheets), learn about tools, read tips on how to adjust your workspace, tutorials and more.
Other Tools
- Pencils . Many books recommend starting calligraphy by writing with two pencils (firmly bound together), training yourself to build letters this way. In any case, a pencil will be useful for sketches and draft text writing, which you can use as a basis for writing in ink.
- A pair of compasses . For lining round objects in composition.
- Pigma micron permanent pens . These pens are perfect for preliminary sketches and drawing out letters.
- Writing desk . A wooden sketchboard can be adjusted at different angles against the table, and the sheet of paper would then be fixed on the surface.
- A rubber and a kneaded rubber . I mostly use a kneaded rubber, because it doesn’t leave waste after cleaning.
- Rulers . They are needed to mark up the sheet of paper and to set the height of letters. You could use a printed handwriting worksheet and put it under the sheet of paper instead.
Other Photos From My Project “Hello From…”
Nowadays calligraphy is in fashion, which only makes me happier. In comparison to digital text, handwriting is a distinct art form, and its uniqueness is being valued more and more highly.
The art of beautiful handwriting shouldn’t be forgotten, and I thank everybody who supports and promotes it today.
I hope that I’ve managed to convince you that anyone can learn the art of calligraphy! All you need is daily practice, inspiration and belief in yourself. And I believe in you. Good luck!
Let’s Practice!
To consolidate your knowledge, I suggest you draw a birthday card. Grab a brush, ink or paint and some cartridge paper. Line the paper, and write your text in the middle of the paper with a pencil. Feel free to add some decorative elements around the lettering according to your taste (balloons, flowers, confetti, etc.).
Make sure that the final composition is aligned and symmetrical. Now you can trace around the letters in ink. Not that difficult, right?
Attach your result in the comments. Can’t wait to see them!
Here is mine:
If you have any questions, please feel free to contact me via Twitter or email .
- The Calligrapher’s Bible: 100 Complete Alphabets and How to Draw Them , David Harris
- The Art of Calligraphy: A Practical Guide to the Skills and Techniques , David Harris
- Stop Stealing Sheep and Find Out How Type Works , Erik Spiekermann
- Helvetica (documentary film)
- The Postman’s Knock
Further Reading
- Understanding The Difference Between Type And Lettering
- Writing Systems And Calligraphy Of The World
- Taking A Closer Look At Arabic Calligraphy
- Beautiful Handwriting, Lettering and Calligraphy
- The Art Of Hand Lettering
Smashing Newsletter
Tips on front-end & UX, delivered weekly in your inbox. Just the things you can actually use.
Front-End & UX Workshops, Online
With practical takeaways, live sessions, video recordings and a friendly Q&A.
TypeScript in 50 Lessons
Everything TypeScript, with code walkthroughs and examples. And other printed books.

5 Minute English
Unveiling the Beauty of English Calligraphy: A Creative Guide
Calligraphy, derived from the Greek words ‘kallos’ (beauty) and ‘graphein’ (to write), is the art of beautiful handwriting. It’s a form of expression where letters are not just written but are brought to life with artistic strokes and styles. In the realm of English calligraphy, this art takes a unique form, blending tradition with contemporary creativity. This comprehensive guide will take you through the journey of English calligraphy, highlighting its history, techniques, tools, and modern applications.
Historical Roots of English Calligraphy
Calligraphy has been an integral part of human civilization for centuries, with each culture developing its own unique style. English calligraphy, in particular, has its roots in the monasteries of Medieval Europe. Monks painstakingly copied texts by hand, not only preserving knowledge but also turning these manuscripts into works of art. The Gothic script, known for its angular and dense style, was predominant during this era.
As time progressed, English calligraphy evolved. The Renaissance period brought a revival of classical ideals and introduced the Italic script, characterized by its sloped and elegant form. This period marked a significant shift, making calligraphy accessible and popular among the educated.
Tools of the Trade
Before diving into techniques, understanding the tools is crucial. The primary instruments in calligraphy are the pen, ink, and paper.
- Pens : Traditional calligraphy is performed with a dip pen and a nib. There are various nibs available, each producing different strokes. Broad-edge nibs create thick and thin lines ideal for Gothic and Italic scripts, while pointed nibs are used for scripts like Copperplate and Spencerian.
- Ink : High-quality calligraphy ink contributes to the fluidity and consistency of your writing. While black ink is traditional, there’s a rainbow of colors available for more vibrant compositions.
- Paper : The right paper can significantly enhance your calligraphy experience. It should be smooth to prevent ink bleeding but with enough texture for nib traction.
Basic Techniques and Styles
English calligraphy is diverse, with several styles to explore. The foundational step for all beginners is understanding basic strokes. These strokes form the building blocks for letters and vary depending on the script.
- Gothic Script : This script is all about precision and geometry. Practice involves creating straight lines and mastering the consistency of angles.
- Italic Script : The Italic script is more fluid and natural. The key is to maintain a consistent slant and fluid connections between letters.
- Copperplate : This elegant script is characterized by thick downstrokes and thin upstrokes, achieved with a pointed nib.
Each style has its own rhythm and personality. Beginners should start with one style, master it, and then experiment with others.
The Creative Process
Calligraphy is not just about replicating styles; it’s also about creativity. Once you have mastered the basics, you can start experimenting.
- Layout and Design : Think about the overall composition. Playing with the arrangement of words and incorporating elements like flourishes can add a unique touch.
- Mixing Scripts : Combining different scripts in one piece can create interesting contrasts and highlight certain words or phrases.
- Incorporating Art : Calligraphy pairs beautifully with other art forms. Incorporating illustrations or using calligraphy as part of a painting can lead to stunning mixed-media pieces.
Modern Calligraphy and Digital Adaptations
The advent of digital technology has opened new avenues for calligraphy. Digital pens and tablets allow for the creation of calligraphic art without traditional tools. This medium also offers the advantage of easy editing and reproduction. Furthermore, modern calligraphy often adopts a more free-form and less structured approach, making it accessible to a wider audience.
Practical Applications
Apart from being a form of artistic expression, calligraphy has practical applications. It’s used in wedding invitations, logo design, and decorative artwork. Learning calligraphy can also improve your handwriting and enhance your appreciation of typography.
Workshops and Communities
Joining a calligraphy workshop or community can significantly boost your learning curve. It offers an opportunity to receive guidance from experienced calligraphers and to share and learn in a community setting.

Detailed Techniques for Beginners
For those starting their journey in English calligraphy, mastering the basic techniques is key. Here are some step-by-step guidelines:
- Holding the Pen : The way you hold the calligraphy pen influences your control and stroke quality. Hold the pen at a consistent angle, typically between 30 to 45 degrees, depending on the script.
- Understanding Pressure : Applying varying pressure is crucial, especially in scripts like Copperplate. Downstrokes require firmer pressure for thicker lines, while upstrokes are lighter.
- Practicing Basic Strokes : Before forming letters, practice basic strokes. These include vertical lines, horizontal lines, curves, and loops. Consistent practice of these elements builds muscle memory and control.
- Forming Letters : Begin forming letters, starting with simple ones. Pay attention to their structure and strive for consistency in size and spacing.
- Joining Letters : Once comfortable with individual letters, start practicing joining them to form words. This is where the art of rhythm and flow comes into play.
Remember, patience and regular practice are crucial in calligraphy. Each script requires time to learn, so don’t rush the process.
Evolution of Calligraphy in the Digital Age
In the digital era, calligraphy has not just survived; it has thrived. Digital tools have democratized the art, making it accessible to a broader audience. Programs like Adobe Illustrator and apps for tablets with stylus support allow aspiring calligraphers to practice without investing in traditional tools. These platforms offer immense flexibility and the ability to experiment with styles and colors without fear of wasting resources.
Digital calligraphy has also opened up new professional avenues. Calligraphers now contribute to digital media, create content for social media, and even work in user interface design, enhancing the aesthetic appeal of digital products.
Therapeutic Benefits of Practicing Calligraphy
Engaging in calligraphy is not just a creative endeavor; it’s also a therapeutic one. The focus and concentration required in calligraphy can be a form of mindfulness, helping to reduce stress and improve mental well-being. The repetitive motion of strokes can be meditative, providing a calming effect.
Furthermore, the satisfaction of creating something beautiful with one’s own hands contributes to a sense of accomplishment and can boost self-esteem. Calligraphy can be a solitary activity, providing a quiet space for introspection, or a communal one, offering opportunities to connect with like-minded individuals.
Advanced Techniques and Experimentation
As you progress in your calligraphy journey, exploring advanced techniques and experimenting with your style is vital for growth:
- Flourishing : Learning to create flourishes can add an elegant touch to your work. These ornamental strokes should complement the letters, not overwhelm them.
- Variation in Mediums : Don’t limit yourself to ink and paper. Experiment with other mediums like brush pens, watercolors, and even digital tools.
- Personal Style Development : As you gain proficiency, start developing your unique style. This could mean tweaking traditional scripts or creating something entirely new.
- Project-Based Learning : Engage in different projects, like creating a calligraphy piece for an event or combining calligraphy with other art forms. This not only boosts your skills but also enhances your creative thinking.
Resources and Continuing Education
There are numerous resources available for those interested in deepening their calligraphy skills:
- Online Tutorials and Courses : Platforms like Skillshare, YouTube, and Udemy offer courses ranging from beginner to advanced levels.
- Books and Publications : Many books are dedicated to the art of calligraphy, offering in-depth knowledge on techniques and styles.
- Calligraphy Forums and Social Media Groups : Online communities are great for getting feedback, sharing work, and staying motivated.
- Workshops and Conferences : Attending live workshops and conferences provides hands-on experience and networking opportunities with other calligraphers.
Final Words
The art of English calligraphy is a journey of constant learning and discovery. It’s an art form that bridges the gap between the past and the present, traditional and modern. Whether you’re picking up a calligraphy pen for the first time or are an experienced scribe, each stroke offers a new opportunity for expression and creativity. Embrace the challenges and joys of calligraphy, and let your creative journey unfold.
Related Posts

- PRO Courses Guides New Tech Help Pro Expert Videos About wikiHow Pro Upgrade Sign In
- EDIT Edit this Article
- EXPLORE Tech Help Pro About Us Random Article Quizzes Request a New Article Community Dashboard This Or That Game Happiness Hub Popular Categories Arts and Entertainment Artwork Books Movies Computers and Electronics Computers Phone Skills Technology Hacks Health Men's Health Mental Health Women's Health Relationships Dating Love Relationship Issues Hobbies and Crafts Crafts Drawing Games Education & Communication Communication Skills Personal Development Studying Personal Care and Style Fashion Hair Care Personal Hygiene Youth Personal Care School Stuff Dating All Categories Arts and Entertainment Finance and Business Home and Garden Relationship Quizzes Cars & Other Vehicles Food and Entertaining Personal Care and Style Sports and Fitness Computers and Electronics Health Pets and Animals Travel Education & Communication Hobbies and Crafts Philosophy and Religion Work World Family Life Holidays and Traditions Relationships Youth
- Browse Articles
- Learn Something New
- Quizzes Hot
- Happiness Hub
- This Or That Game
- Train Your Brain
- Explore More
- Support wikiHow
- About wikiHow
- Log in / Sign up
- Arts and Entertainment
How to Write in Calligraphy
Last Updated: July 29, 2024 Fact Checked
This article was co-authored by Katherine Rinewalt and by wikiHow staff writer, Sophia Latorre . Katherine Rinewalt is a Calligrapher based in Orlando, Florida. Katherine owns Rosebud Calligraphy and has over 6 years of experience. Rosebud Calligraphy is a calligraphy and stationery design studio offering invitations, handwritten pieces, and signage for weddings and special events. Katherine is passionate about helping others elevate their weddings and events with her personalized touch. There are 8 references cited in this article, which can be found at the bottom of the page. This article has been fact-checked, ensuring the accuracy of any cited facts and confirming the authority of its sources. This article has been viewed 1,102,169 times.
Calligraphy means “beautiful writing” in Greek and spans thousands of years and countless cultures. There are several styles, including Western, Eastern Asian, Southern Asian, and Islamic. All calligraphy uses the same basic principals to create beautiful lettering. If you want to practice the art of decorative handwriting, all you need to do is follow a few simple steps.
Learning the Basics of Calligraphy Writing

- For instance, try to make the vertical line the letter “d” parallel with the vertical line in the letter “b.”
Practicing Letters and Words

- For instance, in Western calligraphy, write vertical lines first followed by horizontal lines, such as when writing the letter “t.” [8] X Research source
- In Asian calligraphy, strokes begin at the top of the character and move downward to the to bottom of the character. [9] X Research source
- For Islamic calligraphy, begin with the largest strokes of the letter and progress to the smallest strokes and dots. [10] X Research source

Selecting Your Supplies

- Avoid paper that’s greasy or waxy, which can keep the paper from absorbing the ink.

- Dip pens are pens which you dip in ink. They consist of a wood, plastic or bone handle and a metal nib (the pointed end which will make contact with the paper). The nib is dipped in the ink and stores it in the well of the nib. These are often used in Islamic calligraphy.
- Fountain pens are similar to dip pens but instead draw their ink from a container within the pen. While this ink will occasionally need to be replaced or refilled, it will save you the trouble of constantly needing to dip your pen. Fountain pens are commonly used for Western calligraphy.
- Brushes come in a variety of sizes but will usually all be roughly the same shape. These are dipped in ink and use the pressure and direction of the writer’s strokes to form the line variations. Brushes are often used for Asian calligraphy.

- Pot ink is the most common ink used for calligraphy. This ink comes premixed in a small jar and your writing utensil will be dipped into it, such as for Islamic calligraphy. India ink is the most common type of pot ink used in calligraphy.
- Fountain pen ink is a special kind of dye-based ink which is used for fountain pens, typically for Western calligraphy. It is important to use only fountain pen ink in these types of pens as other ink types will clog the pen. Fountain pen ink will come in either pre-loaded barrels, which you place in your pen, or pots, in which case you fill the pen yourself.
- Ink sticks, which will also require an ink stone, are sticks of ink which must be ground and mixed with water in order to form the ink you will write with. They are an excellent option for calligraphers because they allow you to get many different tones from the same ink, depending on how it is mixed. These are often used in Asian calligraphy.

Sample Alphabets

Expert Q&A

- Calligraphy is a delicate practice - you'll need to devote a lot of time to it to become better at it. Thanks Helpful 15 Not Helpful 2
- Paper, ink, pens, and other supplies can be found in art, craft, and stationery stores as well as online. Thanks Helpful 11 Not Helpful 1
- Use calligraphy pens, which are available in many supermarkets. Thanks Helpful 12 Not Helpful 7
Tips from our Readers
- Calligraphy is also good for making cards or doing project work.
- You can also use brush pens for calligraphy.

You Might Also Like

Expert Interview

Thanks for reading our article! If you’d like to learn more about calligraphy, check out our in-depth interview with Katherine Rinewalt .
- ↑ http://www.calligraphy-skills.com/how-to-write-calligraphy.html
- ↑ https://www.youtube.com/watch?v=sBoVGqiSzr4
- ↑ https://calligraphypen.wordpress.com/2009/01/16/stroking-the-rules/
- ↑ https://design.tutsplus.com/articles/mastering-calligraphy-how-to-write-in-roundhand-script--vector-25652
- ↑ https://www.smashingmagazine.com/2010/05/the-beauty-of-typography-writing-systems-and-calligraphy-of-the-world/
- ↑ http://calligraphypen.wordpress.com/2009/03/09/papers-for-calligraphy/
- ↑ https://calligraphypen.wordpress.com/2009/01/23/selecting-calligraphy-inks-tests-and-reviews/
- ↑ https://calligraphypen.wordpress.com/2009/01/08/basic-calligraphy-tools/
About This Article

To get started with calligraphy, you’ll need a few supplies, including smooth, acid-free paper, a ruler, a calligraphy pen or brush, and some ink. The right kind of pen and ink for you depends on your personal preferences. For instance, some people prefer to use a traditional dip pen and pot ink, while others like the convenience of a fountain pen with a cartridge built in. Have some painter’s tape or paperweights on hand to keep your paper from moving around while you work. Hold the pen diagonally, at a 30 to 60-degree angle, and point the nib slightly to the left as you write. Keep the nib aimed in the same direction all the time, since twisting it will affect the quality of the line. To prevent blotting and uneven lines, always move the nib backwards or sideways away from the direction it’s pointing, instead of pushing it forward. Apply light pressure as you write so that you don’t scratch the paper or damage the nib of the pen. As you’re mastering your technique, you might find it helpful to work on paper with lines or a grid. Follow the guides on the paper to keep your lines straight and parallel and the letter sizes consistent. Start by printing out an alphabet in a calligraphic font that you like, then cover it with a sheet of tracing paper. Trace the alphabet many times until you start to feel comfortable with the strokes. If possible, find a practice sheet that breaks down the letters into their individual strokes so that you know how to do them in the right direction and order. As you get more confident, try writing the letters on your own without tracing them. For instance, you might practice writing the same letter over and over on a grid until you can easily write it with clean, even, consistent-looking strokes. Practice writing notes, journal entries, or anything you like in calligraphy until it starts to feel easy and natural. For tips on how to choose the best paper, pen, and ink for your calligraphy, scroll down! Did this summary help you? Yes No
- Send fan mail to authors
Reader Success Stories
Jan 13, 2017
Did this article help you?
Shelly Moore
Dec 9, 2018
Shreya Soni
Apr 19, 2020
Chavi Rathi
Feb 3, 2017
Maria Jesus Amberg
Jan 24, 2017

Featured Articles

Trending Articles

Watch Articles

- Terms of Use
- Privacy Policy
- Do Not Sell or Share My Info
- Not Selling Info
wikiHow Tech Help Pro:
Level up your tech skills and stay ahead of the curve
13 Websites To Learn Calligraphy Lessons Online (Free And Paid)

Learn Calligraphy Lessons Online
DISCLOSURE: This post may contain affiliate links, meaning when you click the links and make a purchase, we receive a commission.
Calligraphy is the art of writing text with some of the highly complexed and intriguing forms. It does not only look enticing, but has a whole lot of other aspects like art, culture and much more embedded to it.
Calligraphy was considered a modern art and many civilizations saw it as one of the most advanced forms of art. You can evidently find a lot of cultures and civilizations that endorsed calligraphy.
It can be considered one of the most diverse and unified form of art that was equally popular among the different times. Not only that, you can find calligraphy in different religions, regions, cultures and much more.
No matter what font, language or writing style was followed, doing it the most beautiful way has always been the priority of people.You can find evident pieces of calligraphy in ancient artifacts, sculptures, important buildings, documents and literally anywhere possible.
Most of the important religious and political buildings can be found filled with calligraphy. From red Indians to Europeans, Muslims, Buddhists or Asian, you can find calligraphy in all forms.
There were ancient techniques, that are evolved to be the much better version of themselves but there is still a long way to relive the boom of calligraphy.
With computers making everything possible and you can get those perfect fancy fonts by clicking the keys on your keyboard, one might ask if why would you be needing calligraphy.
Well, its all about keeping the art alive and the satisfaction of doing things with your hand. Not to mention, calligraphy makes your writing style look a lot better.
If you are into calligraphy and want to learn some of the expert tricks and tips to step up your game, you can get help from these amazing websites including:
13 Websites To Learn Calligraphy Lessons Online Review

Udemy might be your first choice if you are familiar with the concept of online learning. They are undoubtedly one of the top websites over the internet that are offering online learning facilities.
Thanks to their significantly huge library, you can find courses on almost every imaginable topic in the world on this website. The website is home to millions of courses on employable skills, educational subjects, technical courses, arts & crafts and much more.
All you have to do is sign-up for a free membership on the website that will open the doors for you to get access to all these enticing courses. The website also has some unique filters that allow you to search for the right courses that will be best fit for your learning needs.
You can find a handful of courses and that is too in hundreds keeping the library of Udemy in mind on calligraphy listed on the website. These courses range from some exciting courses to beginner’s calligraphy that are for modern calligraphy techniques to some ancient Arabic calligraphy.
These courses are the right help for you to learn all you need about calligraphy and making your writings pop-out.
2) LinkedIn

LinkedIn the social media for corporates. This is an essential part of every one’s life who is in the corporate field and wants to stay up-to-date with what’s going on around them.
This uniquely interactive platforms allow you to meet the right people around the world to have the corporate connection you need, get access directly to top organizations and much more. However, that is not all.
They have a dedicated section for online learning with hundreds and thousands of courses to help you learn the employable skills that will come handing in your professional career.
Of course, calligraphy might look as an outdated subject but it is actually not out entirely. In fact, modern times and the enthusiasts for art, culture and history have innovated the subtle art of calligraphy and make it more appealing with the help of technology.
So, if you are looking to learn traditional calligraphy on pen or paper, or looking for some high-end course with cutting edge technology to get the right insight on digital calligraphy, this might be the perfect website for you.
You can find some exciting courses on digital calligraphy listed on this website. They are also offering you with an option to get a free trial for a month to understand the courses and see if narrative suits you.

Lynda.com is a platform powered by LinkedIn. It follows a unique approach of making online courses available for all who are into learning. You can find a wide range of professional and employable courses on this website that can help you land your dream job conveniently.
The website is focused on cutting the geographical boundaries and help people in the most remote areas to have their chance of learning the skills that are in-demand and can get you employed.
The website is good for everyone and has solutions for Businesses, Higher education platforms and governments to help everyone get the right edge of online learning.
The website follows a straight forward approach towards online learning and all their courses are compiled on the basis of useful information that can help you learn the right skills you want online.
There are certain courses on calligraphy listed on the website that range from digital to traditional calligraphy.
You can easily find beginner, intermediate and advanced level courses on the website to choose from according to your skill level and make it count.
4) SkillShare

This highly popular and enticing platform is another popular website for learning any skill online. The website is filled with multiple online courses that can help you get the right edge of learning and choose the best course for you.
They have an engaging subscription option that allows you to not pay for each course individually but have access to a premium membership that will unlock all the content that is listed on the website for you easily.
The feature makes it easier for you to switch between courses if you think a certain course is not working for you. This will also allow you to have your hands-on multiple courses at once if you like to learn things online.
You can find hundreds of courses listed on the website that can help you with learning calligraphy. These courses are the best way you can get to learn the fundamentals of calligraphy and making your words count.
You can get some original exclusive courses that can help you with learning calligraphy basics in as low as 10 days to some highly extensive courses with deeper insight on modern and ancient calligraphic techniques.

You are wrong if you are thinking that calligraphy is a lost art and it has no scope in the current world. Today, it has grown its value exponentially as one of the scarce arts that are being practiced in the modern times.
Reed.co.uk is keeping the tradition alive to provide the most authentic content with some of the best features online. They are well known for offering these authentic courses that are going to help you learn literally anything online.
But these courses are a great help for your career as most of the courses listed on Reed.co come with CPD points to help you grow your profile and excel in your career significantly.
The website also provides you access to dedicated portals to find jobs or for those seeking the career advice.Reed.co is offering a limited number of courses, but they are worth each penny and moment you are going to spend trying to learn from these courses.
You can find Calligraphy for beginners’ course that is for enthusiasts who are looking to get their hands in the field and want to learn calligraphy as a hobby.
There is also calligraphy diploma course listed on the website that comes with 150 CPD points and you will get the diploma upon completion as well to help you with the professional career.
6) LearnDirect

Learn Direct is the platform that might not be for you if you are into multiple courses. But this is one of the most authentic platforms when it comes to online learning.
The website is all about convenience of learning brought to your desk. It provides you with all the opportunity to learn anything at the highest academic levels at the comfort of your home.
This website has an easy to follow process to enroll with the courses. All you have to do is meet the requirements for a certain course that you want to join and you can get enrolled with most elaborative and authentic courses online.
LearnDirect is offering a 225 hours course on calligraphy that has 15 modules. This course will allow you to learn all there is out there about calligraphy.
This course contains the information from basic paper calligraphy to some highly advanced techniques of digital calligraphy that you can get your hands on. The website also offers you certification upon completion.
This is a complete online learning program for you if you are not looking for something just as a hobby. The best thing is, you can choose to either pay in full or have some installments for your learning course.

This unique website is anything like the other online learning platforms out there. It is a combination of traditional studies embedded with the interactive online learning modules.
The website is bridging the gap between traditional studies and online learning by making it possible for all to get their hands on the right information and educational value they require.
It started off as a website to help students with their academic career but has grown to be one of the biggest online learning platforms. In addition to thousands of online courses that you can find on this website, this website houses numerous micro and nano degrees as well.
They are partnered with various renowned educational institutes across the world and offering their curriculum online for students to learn efficiently. This provides everyone with an opportunity to learn from their favorite institute online and not have to worry about the geographical boundaries.
You can find some courses that can help you with the basics of wester calligraphic arts to some highly advanced courses that will also help you with getting a degree. You can find effective plans, courses, credit hours for your school on the website as well.
8) Calligraphy

This is a dedicated website devoted to help all the aspirants to learn calligraphy online. The website is in existence since 2009 and has helped thousands of students learn calligraphy ever since.
They have an engaging interface that can catch the attention of anyone and keeps you interested in the learning process. Their learning methods are most suitable for beginners and intermediates that want to learn calligraphy online.
The best part is, all of this is for free and you don’t have to pay for the learning material on website. They can also assist you getting your hands-on top-quality gear and tools that will make your calligraphy learning journey much more convenient.
The website offers you access to interactive lessons that are going to be the right help for you if you are looking to learn basics of calligraphy for personal satisfaction of that art craving.
You can learn easily how to create your personal alphabets, headers, have the liberty to play with some exciting fonts and much more.
The fun doesn’t end here and if you have signed up for a membership on this website, you can get guidance and feedback on your work for indefinite time.
9) Calligrascape

This is another dedicated website that offers learning online for free. If you want to learn calligraphy from the experts and don’t want to put a dent on your wallet, this might be the best opportunity for you.
This website offers an interesting one-page interface that has all that you need to learn about calligraphy. You can have access to videos with calligraphy lessons that pretty much cover everything from the basic to advanced calligraphic lessons.
You can also get your hands on the top insight from the expert in the form of words that will make the whole learning process even more comprehensive.
Along with all those videos and guidance on the website that is available to access for all, you can also find some resources on the website listed that will be an additional help to your learning journey.
These resources include the insight on tools used by the top experts.You can also get your hands on the best paper you can use for calligraphy and also some of the nibs that are suitable for different styles of calligraphy you are looking to learn.
The website also has a store from where you can source all these products and add value to not only your learning but have the right dedication and tools reflect in your work as well.
10) LHCalligraphy

This website is a complete package of help for anyone who is looking to get their hands on a complete online learning platform that can be their guidance for the best calligraphic lessons.
Well, you don’t need to tire yourself more over it. This website got all you looking for. You can sign for their newsletter as well that will allow you to receive regular updates about the calligraphic world.
Not only that, the website also has a store dedicated to calligraphic supplies that are of top-quality and will help you getting the cherry on top of your talent.
Coming to the lessons, the website is a combination of teal pink with white that makes your artistic senses feel alive and you know that you are at the right place if you are looking for something creative, artistic that is out of the box.
You can find a number of courses to choose from that includes flourishing foundations to help you with the basics, calligraphy practice plans to help you keep your fluids going and much more.
There is a wedding calligraphy section on the website that can help you learn the art of handwritten calligraphy for exquisite luxury looking invitations and much more.
11) LearnBrit

This is another website that is focused on home made arts & crafts. The website is your right dose of artistic ventures as it allows you to learn multiple courses at once place.
There is a long list of courses being offered on the website that include Home, food, beauty, fashion and more. You can also get some cool courses on illustration, lettering, photography, design fiber arts and other classes with the relevant topics.
Not to mention, they have some great calligraphic courses listed for you as well.Calligraphy has a scope fare wider than a pen and paper and it has been evident across the human history.
Calligraphy has been used on utensils, monuments, buildings and many other places of significance throughout the known history of developed civilizations.
Although, modern times have changed and it feels outdated to have calligraphy over a building but it opens a whole range off new doors of possibilities for you.
This might be the perfect place for you if you are looking to learn calligraphy and a whole lot of non-traditional applications like calligraphy on cakes, dressing, or creating hand-made cards for your loved ones.
12) TakeLessons

We have been looking at and reviewing the most websites so far with pre-recorded video lessons and written resources that can help you learn calligraphy.
These courses generally target a wide range of students that have different goals set for their learning journey. If you take your learning seriously and want to have better guidance, insight and knowledge of calligraphy, those might not be the most perfect options for you.
Take Lessons is the next leap in the world of online learning as it allows you to get the guidance from some of the highly expert and experienced teachers online.
This way, you don’t have to feel stuck if you cannot grab a particular concept with those pre-recorded videos. Take Lessons have multiple online teachers listed that can help you learn calligraphy with one-on-one sessions.
This is worth each penny being paid for as you will be paying for the time you will spend with these teachers learning the calligraphy.
These teachers can guide you with the basics, help you improve your skills and rectify your mistakes that you might be making in the real time and that too online.
13) CenterOfExcellence

Center of excellence is a UK based website and looks royal by the first impression of their website. They are rated highly over multiple online rating platforms for their over the edge learning programs and a wide range of non-traditional courses that are not being offered by any other website.
The website allows you to get yourself enrolled with any course you might want and get access to it right away. The best part is they focus on dedicating their resources and knowledge to one course and have singular courses on any topic you might want.
You can get the right calligraphy diploma course on this website that has 150 hours of study and 10 modules. This way, you can learn calligraphy at your own preferred pace and the most perfect way.
With each course description, you can find a detailed insight on what you will learn with each module and who can benefit from these courses. You can also get an elaborative insight on the possibilities that this course is going to unlock for you.
The website offers you with choice to pay once, or have the courses financed for you as well. Each course on the website is accredited with CPD and you will earn 150 CPD on completion of calligraphy course with them.
Choosing The Best Calligraphy Lesson Online
Calligraphy has left imprints on our world that are not easy to neglect. You can find calligraphy’s impacts over most civilizations that hit their boom and had a thing for arts. Calligraphy is still believed to be an advanced form of arts that is not easy to master.
However, if you are willing to learn calligraphy online, no matter what your goals are, these websites can help you. Whether you are looking to improve your hand writing, create exciting hand-made cards or learn digital calligraphy to land your next job, these websites can help you do that.
Leave a Comment
How to Learn Calligraphy: The Complete Beginner’s Guide

Hello! It seems you would like to learn calligraphy . That’s awesome, you are going to love the ability to never use a store bought card again and create handmade gifts for your loved ones, or to write your crush a sweet note, ooooor when you are fully practiced, start your own business/store (shameless promotion :P). On this site I have tried to put together a step-by-step beginner’s tutorial that can get anyone started from not writing to learning calligraphy in just a couple steps so stick with me.
If you already have your own tools and want to learn what calligraphy scripts you can learn with them I have a post for that here: A Simple Guide to Calligraphy Tools and Their Respective Calligraphy Scripts
Calligraphy (n) – decorative handwriting or handwritten lettering

Table of Contents
Narrow Down Your Style of Calligraphy
It’s exciting that you are thinking of picking up a new hobby (the best one) but we first need to narrow what kind of calligraphy you are interested in learning first. For there have been many types of scripts in calligraphy over the ages. I will break it down into 5 basic and unofficial categories (but really there are so many different alphabets for each of the listed scripts). Below I have listed them with an incorrect name in quotations that I probably called each of the scripts before I knew the correct name (which is in brackets in the title). I hope that the pictures will give you a little idea of what is out there and then help you to find the script you are looking for!
Script (n) – handwriting as distinct from print; written characters.
5 Types of Calligraphy/Lettering to Learn:
“basic” (aka handwriting and hand lettering).

For those who want to start slow and dip their toe in the water that is calligraphy, monoline calligraphy, handwriting or lettering is where I would start first. It doesn’t require any fancy tools or paper like some other styles of calligraphy. Just you, a piece of paper a pencil and getting right into practicing. Learning this first helps you learn the building blocks of calligraphy like letter structure to then transition into another style.
- Recommended Tools for Monoline Calligraphy = Pen or Pencil
- Learn Monoline Calligraphy (aka cursive)
- Learn Faux Calligraphy (aka thickened cursive)
- Master Class Monoline & Faux Calligraphy Practice Sheets
- Learn Hand Lettering (aka sketched letters)
- Master Class 3D Hand Lettering Practice Sheets
- Improve your Handwriting (Cursive, Proper and Formal)
- Want to see all Handwriting & Hand Lettering Styles?: Breaking Down: Hand Lettering & Handwriting Styles
“Loopy Calligraphy” (aka Modern Calligraphy)

I see modern calligraphy as the best beginner pointed pen script to learn, as consistency, spacing and formatting isn’t as important. Therefore, a beginner can rather focus on learning the letter forms themselves and how to properly use pressure to get the desired stroke shape. It is pretty popular among the Instagram community and has a sort of whimsical style to it that is unique to the writer. Though there are established scripts with the pointed pen I suggest getting used to the pen first.
- Recommended Tools for Modern Calligraphy (Pointed/Dip Pen)
- Learn Modern Calligraphy (Pointed/Dip Pen)
- Want to see all Pointed Pen Styles?: Breaking Down: Pointed Pen
- Master Class Modern Calligraphy Practice Sheets
Pointed pen: More commonly known as the “dip pen.” Contains a metal flexible nib (tip) that requires dipping in ink every so often to disperse ink.
However you can also do modern calligraphy with a brush pen or crayola marker:

- Recommended Tools for Modern Calligraphy (Brush)
- Learn Modern Calligraphy (Brush)
- Master Class Modern Brush Calligraphy Practice Sheets
- Want to see all Brush Calligraphy Styles?: Breaking Down: Brush Calligraphy

“Olde English Calligraphy” (aka Blackletter Calligraphy)

These are blackletter scripts that I started with and therefore are my personal favourite. The pictures are to give you a basic idea of what is possible with broad edge tools . This family of scripts would be, in my humble opinion, the second easiest to learn but has a very high skill possibility and a LOT of different styles to pick from . The line variation is low compared to the pointed pen, as there is no difference in line thickness when you apply more pressure. It depends on the angle of your pen nib and the direction you move it in.
- Need Tools?: My Recommended Tools for Blackletter Calligraphy
- One-stop-shop for learning: Master Blackletter Practice Sheets
- Want to see all Blackletter Styles?: Breaking Down: Blackletter
- Learn Blackletter Calligraphy Post
Blackletter: an early, ornate, bold style of type, typically resembling Gothic. Often created with a broad edge pen.
“Hardcore / Heavy Metal” – (aka Calligraffiti)

If you like more of a modern or hardcore style of blackletter calligraphy let me be the first to introduce you to Calligraffiti. It combines calligraphy and graffiti into a style that looks uniquely awesome. Check out the letter comparison of 3 styles of calligraffiti.

- Recommended Tools for Calligraffiti
- Master Calligraffiti Practice Sheets
- Learn Calligraffiti
“Fancy Calligraphy” (aka Spencerian/Copperplate)

These are the classic dip pen/pointed pen scripts. Similar to the modern calligraphy that I first listed, but much stricter on size, spacing, consistency and formatting. I suggest taking either of these scripts on as a second or third script as they are a whole other beast to tackle. You have to learn the basics through some of the other scripts first then attack this one. When I was first gifted an oblique holder , it was like going back to square one in my learning . It is still doable though if you dedicate some serious time to practicing (as with all of these scripts) you will get there.

- Recommended Tools for Copperplate Calligraphy
- Learn Copperplate Calligraphy Blogpost
- Master Class Copperplate Practice Sheets
- Full Copperplate Calligraphy Video Course
Modern Versus Copperplate Breakdown
If you still aren’t sure about whether to pick modern or copperplate calligraphy, here is a video showing the differences between them and below is a letter breakdown between the different pointed pen scripts.

Calligraphy Roadmap – Styles Ordered by Difficulty
Still unsure of what calligraphy style you want to learn? I have a full clickable mindmap/diagram ordering each calligraphy script you can learn from meby difficulty. Check it out below:

Simple Guide to Calligraphy Tools and Their Scripts
If you already have calligraphy tools, below is a guide to teach what tool makes what letters. Very helpful to get you started learning calligraphy.

That’s all folks!
Thanks for reading until the end! I hope you found a type of calligraphy to learn in this post. If you did tell me which one! If not, bookmark this page and come back later, I will be adding to this page as I go. Maybe you will find something then. Got a script or style not mentioned in this post? Leave a comment and let me know!
38 thoughts on “How to Learn Calligraphy: The Complete Beginner’s Guide”
I just ordered the Pilot Parallel set you mentioned and as soon as it arrives, I’m going to start with a gothic (blackletter) script first!
Any chance you’ll be doing a tutorial on Hobbit calligraphy in the future? Is there a more official name for it than “Hobbit”?
Hi Genevieve,
That’s great to hear, I love it when someone is picking up calligraphy for the first time! Great choice, as that’s the alphabet I started with too. “Hobbit” calligraphy is a version of “Uncial.” Google Uncial alphabet to get what you are looking for.
I plan on adding to these posts as I go, so that’s a great suggestion and I’ll definitely make an alphabet for it. As per a tutorial, maybe in the future. Thanks!
I have a Parallel Pen so will be having a few practices of the Old English scripts. But I do like using my dip pen too.
Same here Valerie!
I personally love all pens that can make Blackletter/Old English scripts, but nothing beats the classic dip pen and ink.
Thank you for an interesting article. I was always told by my school teacher, friends and colleagues that I have a very nice handwriting. Recently I have been thinking how to learn calligraphy and today I have come across your article. I did not even know that there are so many types of calligraphy. After reading your article I decided to give it a try. I think it might be useful and, definitely, It’s interesting. We use a Cyrillic in Mongolia so I have more opportunity to learn calligraphy.
Hey Batjargal!
Glad you enjoyed it! Calligraphy is very handy, if you learn how to letter you can apply it to anything: wood burning, sign painting, card making, wedding calligraphy… you name it! If you want video tutorials on these styles, search “calligrascape” on youtube. 🙂
Can you suggest the optimal size of the Pilot Parallel pen? I going to use it in the A5 notebook for the gothic style. Thanks in advance.
I’d say for an A5 notebook, you should use the green cap 3.8mm pilot parallel.
I already got my 6mm parallel pen to learn italic, I wanna try all the letters but I wanna go slowly, so far I think I´m doing it good, thanks to your page I´m improving every day. I have a question for you, Do you recomend to refill the parallel cartridge? If so, which ink should be appropiate? Thank you, keep doing a great job. 🙂
If you have the proper ink to refill, by all means do that. (Saves you money if you have an eyedropper and buy the ink in bulk)
My all time favourite ink to refill is Ecoline liquid watercolour, It allows mixing of all kinds of colours and flows better than the Pilot Parallel ink (and doesn’t bleed as much)
It can be found here: http://calligrascape.com/calligraphy-tools/
I am anticipating that I am part of those who want to learn, but run into a primary roadblock. As a 76 year-old LEFT hander I have found that I am not helped at all by video of right handed teachers making letters or righties guideline arrows attached to printed sheets and being told “just do them in reverse.
The one complete (I have come to understand) guide for lefties by Shepherd) is no longer in print and even used copies are selling for $79 AND UP! The very few IAMPETH offerings are basic, but do not have specific tricks and techniques outside recognizing that there are underwriters, overwriters and along the line smearers. For me, it is easy to figure many pressure changes for Copperplate and Spencerian in theory and use some creative movements to make them work.
BUT, simple Gothic and Fractur are seemingly the root of sinister problems (yes, the evil root of the word). Underwriter and smearer wrists do not bend to properly adjust the angle of nib width on the Pilot Parallel pens, and constantly shifting between under and hooked-over positions to make proper strokes for each element in each letter is impossible in my opinion.
Now you may be a righty, and I mean no insult when I say that a righty trying to give lessons to a lefty is like a Great Dane Dog giving barking lessons to a Persian Kitten. BUT. a right handed Calligrapher who knows a good (maybe one or two) left handed Calligrapher could make a large step into our unserved part of the market writing and and videoing Calligraphy lessons that go beyond buying pen and ink by solving or offering multiple ways of solving the problems left handers have.
Some of those problems include:
1. Pointed (flex) pens scratching furrows or digging holes in the paper. 2. Controlling broad nib angles in blackletter without the subtle right handed wrist changes. (Rotating pen in fingers is not accurate.) 3. Defeating smear. A bane of sidewriting that some quick dryng ink can solve some of the time while clogging nibs 4. Coping (for side and under writers) with the lack of ability to pull the pen for what righties get for downstrokes and lefties find themselves pushing against the nib inless lifting the pen and changing hand position completely. 5. Some basic exercises for Lefties that help them make letters look as good as written by righties.
Even if you do not answer or do not wish to pursue these ideas, thank you for reading my consistent plaint as a plow through life at an all too quick pace.
Gregory Chmara Tucson, AZ USA Where Ink Dries Fast
Hi Gregory,
I appreciate your feedback and well thought out response. I would really like to help out lefties, I will try to reach out to anyone that may want to collaborate on a project such as this.
Sorry for the late response.
Bom meu amigo, esse conhecimento que estou procurando em busca de uma caligrafia melhor ,bem trabalhada, esta diretamente ligada ao trabalho que realizo hoje,atualmente sou cartazista de supermercado,faço banners com adesivos e o corte é todo manual>Pinto camisas com processo de Silk- screen e eu preciso fazer nos cartazes letras manuscritas,letras tipo bastão usando pincel de pelo e pincel do kit escrita que tenho,vendo seus videos me despertou o interesse de buscar uma teccnica de puxada de letras que ficasse bonita e que fosse realizada com rapidez.Então amigo eu vou em busca do aprimoramento aprendendo cada alfabeto dentro da minha necessidade,quanto mais alfabeto eu aprender será melhor pro meu aperfeiçoamento profissional dentro da área de cartaz.Quero agradecer por você compartilhar seus conhecimentos, lhe desejar um feliz natal e que nós nos encontremos sempre ,para que eu possa aprender muito mais com Você.Obrigado.
Hi Richard,
Your posts, videos and the whole stuff that you make available for us is of a great help for beginners (ont only by the way). Keep up the great job! Gratins for South of France 🙂 Jose
I meant : “Greatings” and not “Gratins” but automatic text filler made it like this … pffff
To Gregory Chmara , the 76-year-old lefty learning calligraphy – I feel your pain. I am a 70-year-old lefty learning also. The one best advice I found that really helped me was to turn my paper to the right 90 degrees (or close to that). That made it possible to pull my strokes instead of push them, and it kept my hand out of the ink I had just put down. When I use a broad nib, I hold the edge at the same angle as a right-handed person would and make the stroke. Hope this is of some help.
_ Thank you hoping to contact in the short time. _____________________________________________________ Nasr A,Alla Arabic Calligraphy Ras Gharib- Red Sea- Egypt
I lived in Italy for 15 years, 11 of them just an hour away from Venice. I picked up a trove of glass pens and love o write and do art work with them. They hold the ink better than a dip pen and are easier to clean. I would recommend them.
Many Thanks!!
Calligraphy plays a vital role in your education career, And this article is great for the person who wants to learn new skill. Such blogs are really necessary for a student who are looking for new hobby, it can really help a lot in improving.
Great site. Glad I found it. Thank you for all the work.
FYI, your “A Simple Guide …” link at the top of the Learn Calligraphy page points to a password protected, WP administrator page instead of https://calligrascape.com/calligraphy-tools-and-their-scripts/
Great I’m happy it can help you! Good catch! Thanks a lot, I would have not found that. It is now fixed. 😀
I’d really try my hand at Copperplate calligraphy, but I’ll start with the basic one first given that I don’t have a particularly neat handwriting. Thanks for putting this guide together!
Ready to dive into the art of calligraphy? This beginner’s guide has everything you need to get started! 🖋️
very informative and insightful
Thanks so much for sharing these teaching skills. I am 74 and have Tremers. I have tried to learn Calligraphy off and on for years but inspired by you to try once more. C~
I haven’t yet found any beginners’ calligraphy course which discusses the difference between using fountain pen ink and calligraphy ink. The difference was certainly not obvious to me. As a beginner, my first port of call for ink was fountain pen ink as I had a large stock. I wish I had read somewhere that fountain pen ink will not work with a dip pen nib on average weight paper, and why.
I do have a post here about the differences between fountain pen ink and calligraphy ink if you are interested:
https://calligrascape.com/fountain-vs-calligraphy-ink/
Thanks Richard
Hi Robert, I am a middle school teacher from China. We (students and teachers) tried to explore a way for the Chinese students to write in English calligraphy. Their handwritings are in different styles, and until now, we kind of find and can do the Chinese Xingkai (literarily, easy modeling)style English handwriting. To my surprise, I find the calligraphy you listed here followed the denition of decrotive but the Chinese one is ethical, musical and esthetical based writing. The authorized and popular calligraphy (historical fronts, traces and styles)are clearly recognizable without decoration. I also seached the database for the calligraphy literature but unfortunately, I can’t find any. I wonder as you are interested in English calligraphy, can you help us for the English calligphy for Chinese students? English is a compulsory course from elementary school to university.
I would love to try and help you and your students. Please email your questions to [email protected]
Thanks, Richard
Good night. I’ve always been verrrry interested in calligraphy and would do my own thing. But now that I’ve found this site, it’s just wonderful. Retired and ready to go. Thank you so much and will keep you posted, if it’s okay. Peace and Graces 🙏🏿
Of course Aisha! Happy practicing! 🙂
I want calligraphy
Ustalar sayti
Leave a Comment Cancel reply
Save my name, email, and website in this browser for the next time I comment.
Sign up to our newsletter!
Question and Answer forum for K12 Students

Calligraphy Paragraph: A Beginner’s Guide To Writing
Calligraphy Paragraph: A calligraphy is an art form that has been practiced for centuries. It involves the creation of beautiful letters and designs using specialized pens, ink, and paper. Not only is calligraphy a visually stunning art form, but it also provides numerous benefits for those who practice it. In this article calligraphy paragraph, we will explore the basics of calligraphy and teach beginners how to write a beautiful calligraphy paragraph.
In this blog Calligraphy Paragraph, we include the Calligraphy Paragraph, in 100, 200, 250, and 300 words. Also cover the Calligraphy Paragraph belonging to classes 1, 2, 3, 4, 5, 6, 7, 8, 9, and up to the 12th class. You can read more Essay Writing in 10 lines, and about sports, events, occasions, festivals, etc… Calligraphy Paragraph is also available in different languages. In the Calligraphy Paragraph, the following features explained are:
Getting Started With Calligraphy
Before you begin writing, you need to ensure you have the proper tools. For calligraphy, you will need a calligraphy pen, ink, and paper. Once you have your supplies, the next step is to learn how to properly hold and angle the pen. The pen should be held at a 45-degree angle, with the nib pointing away from your body. This allows for proper ink flow and creates a consistent line.
Once you have the proper grip, it’s time to start practicing basic strokes and letterforms. It’s important to start with basic strokes, such as the upstroke and downstroke, to get a feel for the pen and ink. These strokes are the building blocks of all calligraphy letterforms. Once you have mastered the basic strokes, you can start practicing individual letters and eventually move on to full words and sentences.
Writing Your Calligraphy Paragraph
Now that you have the basic skills needed for calligraphy, it’s time to put them to use and write your calligraphy paragraph. The first step is to choose the right words and sentence structure. A calligraphy paragraph should be thoughtful and meaningful, so take some time to choose words that convey your message in a beautiful way.
To start writing, begin with a pencil and sketch out the layout of your paragraph. This will help you visualize the spacing and placement of each word. Once you have the layout sketched out, you can start writing with your calligraphy pen. Pay close attention to the spacing between letters and words to create a consistent and visually pleasing paragraph.
It’s important to note that calligraphy is not just about writing beautiful letters, but also about creating a visually pleasing layout. Take some time to experiment with different layouts and spacing until you find one that works best for your paragraph.
Enhancing Your Calligraphy Skills
To continue improving your calligraphy skills, it’s important to practice regularly. Set aside time each day to practice basic strokes, letterforms, and eventually full words and sentences. The more you practice, the more comfortable you will become with the pen and ink, and the more your skills will improve.
In addition to practicing regularly, it’s also important to experiment with different styles of calligraphy. There are many different styles of calligraphy, from traditional scripts to more modern and abstract styles. Experimenting with different styles will help you find your own unique voice and style within the world of calligraphy.

Calligraphy is a beautiful art form that can provide numerous benefits for those who practice it. With the proper tools and practice, anyone can learn how to write a beautiful calligraphy paragraph. Remember to start with the basics, practice regularly, and experiment with different styles to find your own unique voice within the world of calligraphy. Happy writing!
Also Read: Paragraph For Handwriting Practice
FAQs On Calligraphy Paragraph
Question 1. What is a calligraphy short summary?
Answer: A calligraphy is an art form that involves the creation of beautiful and artistic writing using various tools and techniques. It is a versatile art form that can be adapted to suit any occasion or project. Calligraphy requires patience, dedication, and a lot of practice. It is commonly used for wedding invitations, greeting cards, and art prints. There are many resources available online to help beginners learn calligraphy.
Question 2. How do you write in calligraphy?
Answer: Writing in calligraphy involves using specialized writing tools, such as a dip pen or brush, along with specific techniques to create beautiful and artistic lettering. Here are some basic steps to get started:
- Choose your calligraphy tools: There are various calligraphy tools available, such as dip pens, brush pens, and fountain pens. Each tool produces a unique effect, and it’s important to choose the right one for your project.
- Select your ink: Calligraphy ink comes in a variety of colors and types. Choose an ink that complements your project and the tool you are using.
- Practice basic strokes: Calligraphy is all about creating beautiful strokes and curves. Practice basic strokes, such as thin upstrokes and thick downstrokes, to get a feel for the tool and ink.
- Start forming letters: Once you have a grasp of the basic strokes, you can start forming letters. Start with simple letters and work your way up to more complex letterforms.
- Refine your technique: Calligraphy takes practice and patience to master. Continue practicing and refining your technique to create beautiful and artistic lettering.
- Remember, a calligraphy is an art form that requires practice, dedication, and patience. With the right tools and techniques, anyone can learn to write in calligraphy and create beautiful works of art.
Question 3. Why is calligraphy important?
Answer: Calligraphy is important because:
- It is a form of art that allows for self-expression and creativity.
- It promotes mindfulness and relaxation through the slow and deliberate nature of the process.
- It has a rich cultural and historical significance, as calligraphy has been used in various cultures for centuries.
- It is a useful skill for creating personalized gifts, invitations, and other forms of communication that require a personal touch.
Question 4. What are the 4 types of calligraphy?
Answer: There are many different styles and types of calligraphy, but the four main categories are:
- Western Calligraphy: This refers to the calligraphy styles that are used in Western cultures, such as the Roman alphabet.
- Eastern Calligraphy: This includes the calligraphy styles used in Eastern cultures, such as Chinese, Japanese, and Korean calligraphy.
- Arabic Calligraphy: This refers to the calligraphy styles used in the Arabic language, which is known for its flowing and intricate letterforms.
- Illuminated Calligraphy: This is a type of calligraphy that involves the use of gold, silver, or other metallic inks to add decoration and ornamentation to the text. It was particularly popular during the medieval period.
Question 5. What is calligraphy for students?
Answer: Calligraphy can be a beneficial activity for students because:
- It helps improve fine motor skills and hand-eye coordination.
- It can promote mindfulness and relaxation, which can reduce stress and improve focus.
- It encourages creativity and self-expression.
- It is a fun and engaging way to learn about history, language, and different cultures.
Read More Essays:
- My Hobby Drawing
- Rainy Season Paragraph
- My Vision For India In 2047 Paragraph In English
- Computer Paragraph
- Rainy Day Paragraph
- Rabindranath Tagore Paragraph
- A Clear Night Sky Paragraph
- Cow Paragraph
- Durga Puja Paragraph
- Paragraph Say No To Plastic Bags Essay
- How to control the nib
- A few ways to try out calligraphy
- 'Easy' calligraphy?
- Gothic: general overview
- Gothic tutorial p. 1
- Gothic tutorial p. 2
- Gothic tutorial p. 3
- Gothic majuscules (capital letters)
- Italic calligraphy: overview
- How to write italic letters
- Roman alphabet: overview
- Roman Rustic Capitals
- Roman numerals table
- Basics & beyond
- Adjustable lighting
- Colour temperature for calligraphy and art
- Calligraphy alphabets
- What is calligraphy?
- History of calligraphy
- Left-Handed Calligraphy: Some Thoughts
- Traditional Pigments and Inks
- Fancy lettering: general
- Gothic doodle #1
- Gothic doodle #2
- Celtic knotwork: overview
- Draw Celtic knots: p. 1
- Draw Celtic knots: p. 2
- Draw Celtic knots: p. 3
- Draw Celtic knots: p. 4
- Draw Celtic knots: p. 5
- Bubbles: make 'em rounder
- Bubble letters: p. 1
- Bubble letters: p. 2
- Bubble letters: p. 3
- How to write poems
- Sonnets in ten steps
- How to write a haiku
- Gold leaf: overview
- Applying gold leaf
- Trials in water-gilding technique
- Gold leaf supplies (USA)
- Gold leaf supplies (UK & EU)
- Burnishing with agate
- Gold paint, ink etc
- Get in touch!
- Cookies & privacy
- Occasional news
- KSB art miniatures
- Supplies etc
- Guest posts
How to write calligraphy
To learn how to write calligraphy, you need to be familiar with the three most basic calligraphy skills described (and illustrated) below.
If you're already happy using a broad-edged nib, you might like my
- Gothic online tutorial (several pages including majuscules)
- Guidelines for italic calligraphy (two pages)
Calligraphy requires very few special items to start with. Luckily, too, they’re mostly simple and inexpensive:
• A calligraphic writing tool such as a pen or brush • Ink, or similar • Paper (or another writing medium) • A smooth, hard, flat supporting surface • A seat at a comfortable height • Optional: a ruler and pencil (for lines to write along)
It’s also an advantage to write your calligraphy on a sloping surface.
Practising vital calligraphy skills
Learning how to write calligraphy in the Western world means learning how to manipulate a ‘thick-and-thin’ effect which pleases the eye with a flowing, regular pattern.
Even if you already know how to write calligraphy, it's worth refreshing these three core skills:
- Keep the pen-angle constant;
- Lead the nib, don’t push it;
- Make parallel lines and even curves.
Get these right and the rest is just detail, variation and practice. Well ... mostly :-)
How to write calligraphy: the first skill
Hold your pen at an unchanging angle. For most scripts you'll hold the pen so that the tip of the nib points diagonally away from you to the left, at around 30-60 degrees. (The exact angle varies for different scripts - don't worry about this for the moment.)
How to write calligraphy: the second skill
Lead the nib gently across the paper, moving it backwards or sideways from the direction it's pointing in. Use little pressure and keep your hand barely touching the paper - try not to lean heavily on your hand, wrist, forearm or elbow.
How to write calligraphy: the third skill
These are separate skills.
Many beginning calligraphers never realize that these are all separate skills, and they don't find out why they can’t make the effects they want.
Drawing lines so they are at the same angle as each other (skill no. 3) is a different action from keeping your pen-nib at a constant angle (skill no. 1). You can keep your pen-nib at the same angle and still draw vertical parallel lines … horizontal parallel lines … and sloping parallel lines. (This is a useful warm-up exercise, by the way.)
Just because you were drawing a vertical line before and now you are drawing a horizontal line does not mean that you alter your pen-angle!
And just because you are not holding your pen at a vertical angle (for example) does not mean that you cannot draw a vertical line!
Keeping a light, constant pressure on the nib (skill no. 2) is separate again, and is necessary to create even letterforms and layouts.
Illustrations of basic calligraphy exercises
When those skills are separate in your head and (more importantly) in your hand, you’ve mastered the basics of how to write calligraphy. That’s the essential simplicity of it.
So now you've grasped the basic principles of Western calligraphic writing (at least as I understand them!) you may be wondering what is next?
Just as in skiing or learning a foreign language or memorising a routine ... next is PRACTICE. Ask any calligrapher!
(If you're wondering how to write calligraphy with different sorts of tools such as felt-pens, square brushes etc, you might like the 'Five Options' calligraphy tutorial. If you're looking for a quick-and-easy calligraphic effect or you've hit a wall in your calligraphy practice, you might want to have a look at the page on 'easy' calligraphy.)
Just out of interest, the reason why calligraphy pens have a broad, flat nib is because the earliest Western pens were made out of reeds or feathers which were only strong enough to be used for writing if they were not sharpened to a thin point. (In the Far East the problem was solved by making special brushes to paint the letters with. The Arabic-speaking world uses thick-and-thin nibs made of reeds which are cut differently from ours.)
The thick-and-thin effect and small decorative tags or serifs which were created by our early nibs became the standard appearance for good writing. They can still be seen in traditional typefaces or fonts such as Times New Roman. More ‘modern’ fonts such as Arial (and most other internet-friendly typefaces) have removed the thick-and-thin effect and the serifs. Such fonts are called ‘sans-serif’ ('without serifs') for that reason. They are easier to read than traditional letters on a glowing screen – but they look bland, impersonal and utilitarian on paper.
| Facebook Twitter Pinterest Tumblr Reddit WhatsApp |
Would you prefer to share this page with others by linking to it?
- Click on the HTML link code below.
- Copy and paste it, adding a note of your own, into your blog, a Web page, forums, a blog comment, your Facebook account, or anywhere that someone would find this page valuable.
"Calligraphy is a craft requiring singularly few tools – the writing instrument, the ink and the writing surface are the only essentials. The art of calligraphy depends on the scribe having an understanding of the proper use of all three, on his knowledge of letterforms and on his skill and freedom in their use."
Heather Child, 'Pens in Perspective', The Calligrapher's Handbook
Calligraphy basics
Gothic script, italic script, roman script, tools, materials, workspace, lettering & misc., fancy lettering, celtic knotwork, bubble lettering, writing verse, about the site.
This site uses cookies to keep track of some visitor activity and information, which cannot be used to identify you. Use of the site means you accept this use of cookies. Please see the site privacy policy for more information.
(c) Katharine Scarfe Beckett 2008-2022. All rights reserved.
The Basic Calligraphy Strokes Guide (+FREE Worksheets)

This post and the photos within it may contain affiliate links. If you purchase something through the link, I may receive a commission at no extra charge to you.
The basic calligraphy strokes are the best way to learn calligraphy as a beginner.
In fact, the number one struggle for beginners I most commonly see is not learning and practicing the basic calligraphy strokes.
This tutorial will teach you everything you need to know about basic calligraphy strokes.
I’ve included some free basic calligraphy strokes worksheets, so be sure to stick around until the end of this tutorial.
Here is a quick overview of the article –
- Tools needed to practice the basic calligraphy strokes
- What are basic strokes in calligraphy? How many basic strokes does calligraphy have?
Basic calligraphy strokes breakdown
Basic calligraphy strokes alphabet demonstration.
- Basic calligraphy strokes worksheet
Quick recap + final words
Without any further delays, let’s jump straight into this tutorial.
If you’re a complete beginner, I highly recommend you check out my ultimate guide for calligraphy beginners.
Tools needed to practice the basic calligraphy strokes.
To practice the basic calligraphy strokes, you’ll need a very basic calligraphy tool setup (links to Amazon) –
- Pens (writing tools)
Pencil

You can practice the basic calligraphy strokes using a brush pen, pointed nib, or even a regular pencil.
If you’re just getting started, I recommend (links to Amazon) –
- Small brush pen – Tombow Fudenosuke or Pentel Touch Brush Pen

You might also be interested in reading my review on the best brush pens for calligraphy beginners.
Aside from your writing tool, you’ll need some paper.
If you use a brush pen or a dip pen + pointed nib, you will need specific papers; otherwise, you risk ruining the tips of your brush pens or ink bleeds.
I recommend the following papers (links to Amazon) –
- HP Premium 32 (cheapest and ok quality)
- Canson marker paper
- Rhodia paper
- Any other bleed-proof marker paper.
I also wrote a separate guide on the best calligraphy papers.

Ruler
You’ll need the ruler to create calligraphy guidelines to keep your basic strokes accurate and consistent.
I have a whole separate tutorial on how to create calligraphy guidelines that you can read here .
I highly recommend that you do.
For guidelines, I always use and recommend the rolling ruler.

We need the pencil to create our guidelines.
I work with an HB mechanical pencil , but you can use whatever you have at hand.
What are basic strokes in calligraphy?
The basic calligraphy strokes are the building blocks of calligraphy letters. These are individual strokes that, when put together, form different letters of the lowercase alphabet.
")
We use basic strokes in both modern and traditional calligraphy.
In fact, I talk about the basic calligraphy strokes in my modern calligraphy tutorial for beginners.
Any style created with a pointed nib or a brush pen.
Let me give you a bit of context as to why these basic strokes are so important.
To the untrained eye, a word in calligraphy may seem that has been created in one take without lifting the pen.
Similar to cursive writing.
However, calligraphy and cursive writing are two very different things.
- Calligraphy is done slowly, the pen is lifted often, and each stroke is created with focus and precision. The strokes also vary in thickness.
- Cursive writing, on the other hand, is more fluid, done quickly, and the pen is lifted less frequently.

It’s essential to understand this difference because the basic calligraphy strokes allow you to drastically improve the precision and consistency of your calligraphy.
The basic calligraphy strokes also help us learn how to write the whole alphabet and to identify when we should lift the pen after each stroke.
In this way, you dont have to memorize the letters individually and guess when to lift the pen.
How many basic strokes does calligraphy have?
There are 8 basic calligraphy strokes, and they are –
- The entry stroke
- The underturn
- The overturn
- The compound curve
- The oval
- The reverse oval
- The ascending loop
- The descending loop

Some letters of the alphabet are an exception to these basic strokes.
I’ll get to them later in the article.
Here are a few quick examples of how we use these basic strokes to combine different letters.
- The letter a is created with an entry stroke, an oval, and an underturn.
- The letter n is made with an underturn and a compound curve.
- The letter b combines an entry stroke, an ascending loop, and a reverse oval.

Now let’s take a closer look at the basic calligraphy strokes.
If you’re entirely new to calligraphy, it’s essential to understand the two basic motions.
- When you move upwards with your pen, your strokes should be thin (low pressure)
- And when you move downwards, your strokes should be thick (more pressure).

Ok, now I’m going to go over each stroke to give you a better overview of how to write them out.
Once again, it is absolutely crucial to do this using calligraphy guidelines.
1. The Entry Stroke
The entry stroke is a thin upstroke that starts from the baseline and slightly curves following the slant lines to the waistline.
In most instances, you won’t have to take it up to the waistline but rather to the middle or slightly above.

Here are a few examples of what you should try to avoid –

2. The Underturn
Begins at the top of the waistline as a thick stroke.
Then, it curves on the baseline and comes back up as a thin upstroke to the waistline.
Two important things to mention here.
- The downstroke and upstroke are parallel to each other and follow the slant lines of our guidelines.
- You begin to release the pressure slightly above the baseline to get a smooth, gradual transition.

Here you can see a few examples of what you should try to avoid doing –

3. The Overturn
It is absolutely the same as the underturn, just in reverse.
You begin from the baseline with a thin upstroke, curve on the waistline, and come back down with a thicker downstroke to the baseline.
Again, both strokes are parallel and follow the slant lines.
Start applying the pressure gradually right after the curve.

4. The Compound Curve
A combination of the two previous strokes.
Slightly more challenging.
Begin with a thin upstroke, curve at the waistline, come down with a thicker downstroke, curve on the baseline, and back up with a thin upstroke.
All three lines are parallel, following the slant lines.

Try to avoid these mistakes –

5. The Oval
Probably the trickiest basic calligraphy strokes.
Start slightly from the right side (2-3 o’clock) with a thin upstroke. Curve upwards (counterclockwise) into a thick downstroke which is also curved. Gradually transition on the baseline into a thin upstroke to join the oval.

Avoid these common mistakes with the oval shape-

Important note –
Another important mention about the slant of the oval stroke.
I often see people confused about how to angle the oval correctly.
The best way to direct the oval is by using an axis line.
The axis line is basically a line that goes through the middle of an oval and splits it into two equal parts.

Obviously, you can’t always stop mid-practice just to draw an axis line for your oval.
However, what you can do is imagine one and use that as a guide for the slant of your oval.
6. The Reverse Oval
Pretty much the same thing as the oval, just in reverse.
Here you can also slightly modify it, and instead of joining the two strokes, the reverse oval can and in a half loop inside like this.

7. The Ascending Loop
The ascending loop begins at the waistline and extends in a curved thin upstroke to the ascending line.
At the ascending line, it curves back down towards the baseline following the slant angle.
As it curves, you gradually apply pressure to create a thick downstroke.
Alternatively, you could start slightly above the waistline with light pressure that gradually becomes a thicker stroke all the way to the baseline and add the loop as a second stroke.

This second method is often used for adding flourishes at the end.
Because with a closed-loop, your flourishing options are limited.
Both ways are good for closed loops, so use the one that suits you best.
Here are a few examples of common mistakes you should try to avoid –

8. The Descending Loop
Pretty much the opposite of the ascending loop.
Start from the waistline with a thick stroke.
Then, take it down to the descending line, and right before it, start releasing the pressure for a smooth thick, and thin transition.
Then, you curve it on the descending line and right back up in a curved, thin upstroke to the baseline.

A note about counter spaces (important!)
If you don’t know what counters are, it’s basically the white space inside of the letters.
We differ two types of counters – opened and closed.

To make your basic calligraphy strokes and your calligraphy, in general, more consistent, it’s important to keep an eye on your counter spaces.
By maintaining an equal counter space (both open and closed), we get a much more consistent and balanced look.
The example below shows that counters with equal space look much better than those without.

Obviously, it’s impossible to measure this perfectly, but it’s just something I wanted to point out.
In the video below, I demonstrate how I use the basic calligraphy strokes to write out the whole lowercase (minuscules) alphabet.
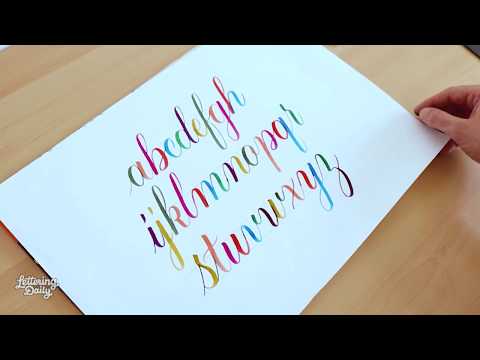
I also created a tutorial on how to write a brush calligraphy alphabet from a to z.
Exception letters
As I mentioned earlier, some letters are an exception to these basic strokes.
Their shape is simply different and unique, and therefore you memorize them.
Some of these letters are – s, f, x,

However, some letters have a certain element of these basic strokes, with a slight variation or addition.
Here are a few examples –
- The letter t is an extended underturn (variation) with a horizontal/wavy crossbar (addition).
- The letter k is an ascending loop with a small R shape below.
- The letters c, e, and o are variated ovals with a small addition.
- The letter q is composed of an oval and a reversed descending loop.

Basic calligraphy strokes worksheets
I’ve created free printable worksheets to help you put the theory into practice.
I highly recommend you practice these basic strokes before attempting to write letters, words, sentences, etc.
I promise that if you practice for just 15 minutes a day for 30 days (consistently), you will significantly improve your skills.
In these worksheets, you’ll find –
- The two fundamental strokes (up thin, down thick)
- The 8 basic calligraphy strokes

The worksheets, along with all the other freebies, are located inside the Lettering Crate.
If you’re new here, just sign up for the newsletter, follow the super easy instructions, and get instant access to the Lettering Crate.

Stay updated with my tutorials and get instant access to the Lettering Crate –
A growing library of free lettering & calligraphy resources that includes –.
- Calligraphy practice sheets
- Procreate brushes
- The 30-day lettering planner
- Printables, and more!
The Lettering Crate is an exclusive member area where I upload ALL free worksheets (and other freebies) to help you learn and improve your skills.
Note – if you struggle to access the worksheets, email me rather than leave a comment below.
Let’s have a quick recap of everything we talked about in this tutorial –
- The basic calligraphy strokes are the building blocks of letters
- There are 8 basic calligraphy strokes
- Basic calligraphy strokes allow us to learn the whole alphabet and drastically improve our consistency
- Calligraphy and cursive writing are not the same thing and should be approached differently
- Some letters are an exception to these basic strokes
- Some letters are slightly modified, and some have small additions to them
- Always work with guidelines!
- Keep an eye on your opened and closed counters
- 15 minutes a day for 30 days (consistently) will do wonders for your calligraphy skills
If you are interested in other styles, check out my article on the 10 calligraphy styles for beginners.
And once you feel confident with your basic strokes, you can read about other helpful calligraphy practice tips.
And there you have it, friends.
I hope this tutorial helped shed some light on the basic calligraphy strokes and how to use them to learn calligraphy.
If you have any questions or comments, feel free to drop a comment below or reach out via email.
Until the next one!

About the author

Hey, I’m Max Juric, and I’m deeply passionate about calligraphy and hand lettering.
I’ve spent years honing my skills in the art of lettering, working with hundreds of clients from all over the world on design projects such as logotypes, branding, custom lettering, murals, and more.
But my journey doesn’t end there. I’ve also dedicated myself to sharing my knowledge and expertise with others, creating a wealth of resources including tutorials, articles, and podcasts.
It’s been incredibly rewarding to see thousands of people engaging with my content each month. Knowing that I’m helping fellow enthusiasts grow and develop their skills makes me really happy.
Welcome to Lettering Daily, your hub for all things lettering and calligraphy. Whether you’re a seasoned pro or just starting out, I’m here to inspire and guide you on your lettering journey. Stick around, and let’s explore the world of letters together!
12 thoughts on “The Basic Calligraphy Strokes Guide (+FREE Worksheets)”

Thankyou for your clear instructions. The description is so detail. I do really understand what to do.
Awesome! Glad to hear that 🙂

Thank you for this guide. I struggle with how to hold the pens so my hand doesn’t have to do all the weird movements to get the up and down strokes.
The pen hold should be constant. You shouldn’t have too much movement of the tool in your hand. Im going to make an article about that as well, but if you want, in the meantime, feel free to send me an email and I’ll do my best to help you out.

Thank You very much, is a very good tutorial to follow.
Thank you, Jose! It means a lot. Im glad to hear that 🙂

Thank you Max for this very detailed tutorial. Now I know why my work looks bad. I will follow your advise.
Thank you, Melissa. Im glad you found this tutorial helpful. If you need further assistance with your work, consider joining the Facebook group 🙂

Oh wow, my goodness, what a gem of a post! So thorough and at the same time such a pleasure to read. Thank you so much for this!!!
Thank you, Agata! Im really glad you liked the article. Let me know if you have any questions 🙂

Thank you. Your instructions are wonderfully clear and the examples are a joy to behold. As well as inspiring!
Thank you, Diane. Im glad that this article was helpful for you! 🙂
Leave a Comment Cancel Reply
Your email address will not be published. Required fields are marked *
Save my name, email, and website in this browser for the next time I comment.
This site uses Akismet to reduce spam. Learn how your comment data is processed .
Online Class: Western Calligraphy
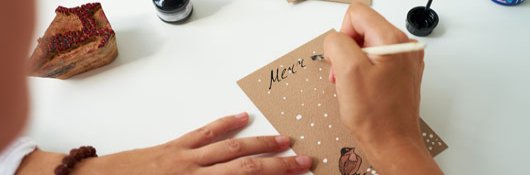
- 43 Exams & Assignments
- 3,944 Students have taken this course
- 15 Hours average time
Course Description
"The Timeless Elegance of Western Calligraphy: Crafting Words into Art"
From the ancient scrolls to the elegant wedding invitations of today, the art of Western calligraphy has been an embodiment of beauty, elegance, and profound emotions. More than just a skill, it's a dance of the hand, a meditation, and a way to breathe life into letters. As each stroke unfolds, it tells a story; of traditions, of history, and of personal journeys. Are you ready to embark on this enchanting voyage of crafting words into art?
Delve Deep into the Heart of Western Calligraphy:
In this course, we shall traverse through the intricate alleys of Western calligraphy, which is not merely a hobby but a soulful pursuit. In an era where digital text dominates, calligraphy offers an intimate, tactile experience of words, bringing back the nostalgia of handwritten notes and personal touches.
Unravel the Magic, One Letter at a Time:
From the foundational hand to the Gothic script, from Italic to Copperplate, this course will introduce you to the vast spectrum of Western calligraphy. Each script has its own history, its rhythm, and its spirit. We'll meticulously dissect each letterform, allowing you to understand the flow and finesse behind it.
For Everyone and Anyone:
Artistic background or not, age no bar; calligraphy is universal. Whether you are an artist yearning to add another skill to your portfolio, a retiree seeking a meditative hobby, or a student wanting to create hand-lettered projects, this course has treasures for everyone. Young, old, or somewhere in between, the magic of calligraphy awaits.
Expand Your Canvas:
While paper is the traditional choice, calligraphy is limitless. Imagine crafting elegant script on ceramic plates, delicate glassware, rustic wooden boards, or soft fabric. The potential applications are endless, and by the end of this course, you'll be equipped to turn any surface into a piece of art.
Build and Flourish:
With the skills acquired, you could explore numerous avenues. Personalize gifts, offer custom-made calligraphic services, or launch your own line of hand-lettered products. Whether it's selling at local fairs, collaborating with stationery brands, or starting an online store, the world is your oyster.
Journey with an Expert:
Guided by Nancy, a seasoned calligrapher, you'll be mentored with care, patience, and passion. Her insights, drawn from years of experience, will ensure that every question you have is answered, every challenge you face is surmounted.
Community and Beyond:
As you delve deeper, you'll become a part of a thriving community of calligraphers. Share your work, seek feedback, collaborate on projects, and immerse yourself in the sea of inspiration that surrounds this art form.
- Historical Perspectives: Dive into the fascinating history of calligraphy, understanding its evolution and significance through eras.
- Materials Mastery: Navigate the vast array of calligraphy tools, from quills and nibs to a myriad of inks and papers.
Words as Legacy:
In a world fleeting by, calligraphy offers a moment of stillness, a connection to our roots. The letters you craft today could be treasures for generations tomorrow, heirlooms that carry the weight of your emotions and the beauty of your artistry.
So, why wait? Embark on this transformative journey, where words transcend their meanings, where every letter you pen is a reflection of your soul, and where art and language converge to create magic. Dive deep, let the rhythm of calligraphy engulf you, and discover the artist within. Sign up today and let your journey into the world of Western Calligraphy unfold! 🖋📜🎨

- Completely Online
- Printable Lessons
- 6 Months to Complete
- 24/7 Availability
- Start Anytime
- PC & Mac Compatible
- Android & iOS Friendly
- Accredited CEUs

Course Lessons

Lesson 1: History of Calligraphy
Lesson 2: Materials and Supplies
Lesson 3: getting started, lesson 4: uncial calligraphy, lesson 5: foundational hand calligraphy, lesson 6: roman rustic calligraphy, lesson 7: versals calligraphy, lesson 8: batarde calligraphy, lesson 9: italic calligraphy, lesson 10: copperplate calligraphy, lesson 11: gothic calligraphy, lesson 12: more and more calligraphy, lesson 13: beyond the alphabet and chinese calligraphy, lesson 14: flourishes and decoratives, lesson 15: final fonts and calligraphy from around the world, lesson 16: onward and upward, learning outcomes.
- Describe the history of calligraphy.
- Determine materials and supplies needed.
- Describe and demonstrate uncial calligraphy.
- Describe and demonstrate foundational hand calligraphy.
- Describe and demonstrate Roman Rustic Calligraphy.
- Describe and demonstrate Versals Calligraphy.
- Describe and demonstrate Batarde Calligraphy.
- Describe and demonstrate Italic Calligraphy.
- Describe and demonstrate Copperplate Calligraphy.
- Describe and demonstrate Gothic Calligraphy.
- Demonstrate mastery of lesson content at levels of 70% or higher.
Additional Course Information

- Document Your Lifelong Learning Achievements
- Earn an Official Certificate Documenting Course Hours and CEUs
- Verify Your Certificate with a Unique Serial Number Online
- View and Share Your Certificate Online or Download/Print as PDF
- Display Your Certificate on Your Resume and Promote Your Achievements Using Social Media

Choose Your Subscription Plan
| Includes certificate | X |
| Includes CEUs | X |
| Self-paced | |
| Instructor support | |
| Time to complete | 6 months |
| No. of courses | 1 course |
| Includes certificate | |
| Includes CEUs | |
| Self-paced | |
| Instructor support | |
| Time to complete | 6 months |
| No. of courses | 1 course |
| Includes certificate | |
| Includes CEUs | |
| Self-paced | |
| Instructor support | |
| Time to complete | 12 Months |
| No. of courses | 600+ |
| Includes certificate | |
| Includes CEUs | |
| Self-paced | |
| Instructor support | |
| Time to complete | 24 Months |
| No. of courses | 600+ |
Student Testimonials
- "It was a great class. I did learn a lot. Everything I write now is calligraphy. Thank you for the great course." -- Sonia M.
- "I really didn't have an expectation of the material, I only had previously associated calligraphy with beautiful writing. But the course opened my eyes to the history and it was very interesting and presented very clearly." -- Meiissa P.
- "Its been amazing. The exams are quite intense but have enjoyed the practical elements most." -- Billie-rose D.
- "It was fun! The homework was hard." -- Dh H.
- "Enjoyed the class and feel I learned a lot!" -- Theresa S.
Related Courses

- Course Catalog
- Group Discounts
- Gift Certificates
- For Libraries
- CEU Verification
- Medical Terminology
- Accounting Course
- Writing Basics
- QuickBooks Training
- Proofreading Class
- Sensitivity Training
- Excel Certificate
- Teach Online
- Terms of Service
- Privacy Policy

COMMENTS
Watch My Handwriting Course Free: https://shrinke.me/4S2s Visit my Website: https://www.trustlawyerz.com How to write Assignment in Beautiful English Calli...
Watch My Handwriting Course Free: https://shrinke.me/4S2s Visit my Website: https://www.trustlawyerz.com
How to write English Assignment in calligraphy beautiful and professional handwriting in calligraphy for beginners to learn about the calligraphy and handwri...
We said at the beginning that 15 minutes of practice a day is better than 5 straight hours once a month. But if you have the time for it, we recommend allocating of dedicated practice time for your session to truly make a difference. Honestly the hardest part is getting out a pen and sitting down to practice.
These simple calligraphy practice sheets are ones that we use on a regular basis. They contain the slanted guidelines that are essential for creating consistency in your letters. Consider using this printable worksheet if you're familiar with your basic strokes and are ready to write whole words and sentences at once.
A skilled designer is able to create a beautifully finished composition through a series of. This is true for a lettering composition, a painting, a song, a photo - these fundamentals of design apply to all works of art! The elements of design are the invisible forces behind great layout and composition. In design theory, these intentional ...
The three-step formula. Step 1 - Choosing a calligraphy style. Step 2 - Picking the correct calligraphy pen + the essential calligraphy tools. Step 3 - Find a proper study resource and create an effective practice routine. Additional learning resources for calligraphy. Advanced calligraphy techniques and effects.
What will you learn in this online course? 17 lessons & 7 downloads. History of English calligraphy. 2 minutes, 23 seconds. Materials and tools. 9 minutes, 21 seconds. Guidelines and ergonomics. 6 minutes, 37 seconds. Basic lowercase traits.
English roundhand (View large version) Modern calligraphy script (View large version) Flourishing (View large version) First lesson on textura quadrata and my home assignment (View large version) "With the development of an international exchange of information, there is a need for universal fonts.
Calligraphy, derived from the Greek words 'kallos' (beauty) and 'graphein' (to write), is the art of beautiful handwriting. It's a form of expression where letters are not just written but are brought to life with artistic strokes and styles. In the realm of English calligraphy, this art takes a unique form, blending tradition with ...
Hold your pen diagonally at a 30 to 60 degree angle. A calligraphy pen isn't used quite the same way as a regular pen. The tip, or nib, of the pen should point diagonally away from you, to the left, as you write. [1] 2. Don't twist the nib as you write. The tip of writing tool used to do calligraphy is called a nib.
Watch on. For this little demonstration, you only need two things: a writing utensil (pen, pencil, marker, crayon, etc.) and a piece of paper. Calligraphy is a joyful hobby, so we're going to use the word "joy" in this tutorial :) The word "joy" written in calligraphy step by stepy. on a piece of paper in cursive.
how to write English assignment in stylish calligraphy | English writing with markerTopic.1. how to write word English assignment2. English stylish calligrap...
Pointed nib and pen holder of your choice. Ink of your choice (instructor used walnut ink) Pencil and eraser (not needed if using a light pad) Light pad (optional) Optional: other writing utensils such as felt tip markers, glass dip pen, etc. Instructor: Sabine Tack. Instagram: @federverliebt. Have you ever seen a calligram, one of those ...
10) LHCalligraphy. This website is a complete package of help for anyone who is looking to get their hands on a complete online learning platform that can be their guidance for the best calligraphic lessons. Well, you don't need to tire yourself more over it. This website got all you looking for.
Bristol is a thicker type of drawing paper that is made by gluing together to form multi-ply sheets. Because of that, it's usually sold in smaller quantities and for a higher price. Nonetheless, it's a fantastic paper for final calligraphy projects. You can find two types of surfaces on Bristol paper, Smooth or Vellum.
Calligraphy is a visual art of writing letters in a skillful, creative, and expressive way. It can give life to boring texts and make them beautiful. Want to...
5 Types of Calligraphy/Lettering to Learn: "Basic" (aka Handwriting and Hand Lettering) "Loopy Calligraphy" (aka Modern Calligraphy) "Olde English Calligraphy" (aka Blackletter Calligraphy) "Hardcore / Heavy Metal" - (aka Calligraffiti) "Fancy Calligraphy" (aka Spencerian/Copperplate) Calligraphy Roadmap - Styles Ordered ...
A calligraphy is an art form that involves the creation of beautiful and artistic writing using various tools and techniques. It is a versatile art form that can be adapted to suit any occasion or project. Calligraphy requires patience, dedication, and a lot of practice. It is commonly used for wedding invitations, greeting cards, and art prints.
How to write calligraphy: the first skill. Hold your pen at an unchanging angle. For most scripts you'll hold the pen so that the tip of the nib points diagonally away from you to the left, at around 30-60 degrees. (The exact angle varies for different scripts - don't worry about this for the moment.) The nib should not turn as you form lines ...
Written using a Pilot Parallel Pen 3mm. A substyle of the Blackletter script, this is an example of Brenda's Ophelia style. Here in this calligraphy alphabet, we see the use of squared dots, creating a unique embellishment. The detailing is both delicate, in the hairlines (the thin lines) and bold, in the dots.
Similar to cursive writing. However, calligraphy and cursive writing are two very different things. Calligraphy is done slowly, the pen is lifted often, and each stroke is created with focus and precision. The strokes also vary in thickness. Cursive writing, on the other hand, is more fluid, done quickly, and the pen is lifted less frequently.
Online Class: Western Calligraphy. This course provides you with the expert guidance, HD Video tutorials, step-by-step directions, and hands-on activities with feedback so you can learn how to create a wide variety of calligraphy to suit any need or occasion. $ 95.00.